Business Transactions
Introduction
A Business Transaction visually represents the requests and responses within an application’s services, offering an end-to-end view of the processing path for fulfilling service requests. It’s a crucial element for monitoring, encompassing essential services like login and checkout, and reflects user interactions with your applications, such as adding items to a cart or checking out, involving various applications, databases, and APIs.
In Cisco Cloud Observability, Business Transactions represent a key entity, linked to application services and service instances.
Identifying Business Transactions
In this section, you’ll discover how to effectively navigate and utilize the Business Transactions entity as a powerful tool in your monitoring strategy.
Navigate to your CCO tenant via the CCO Tenant URL.
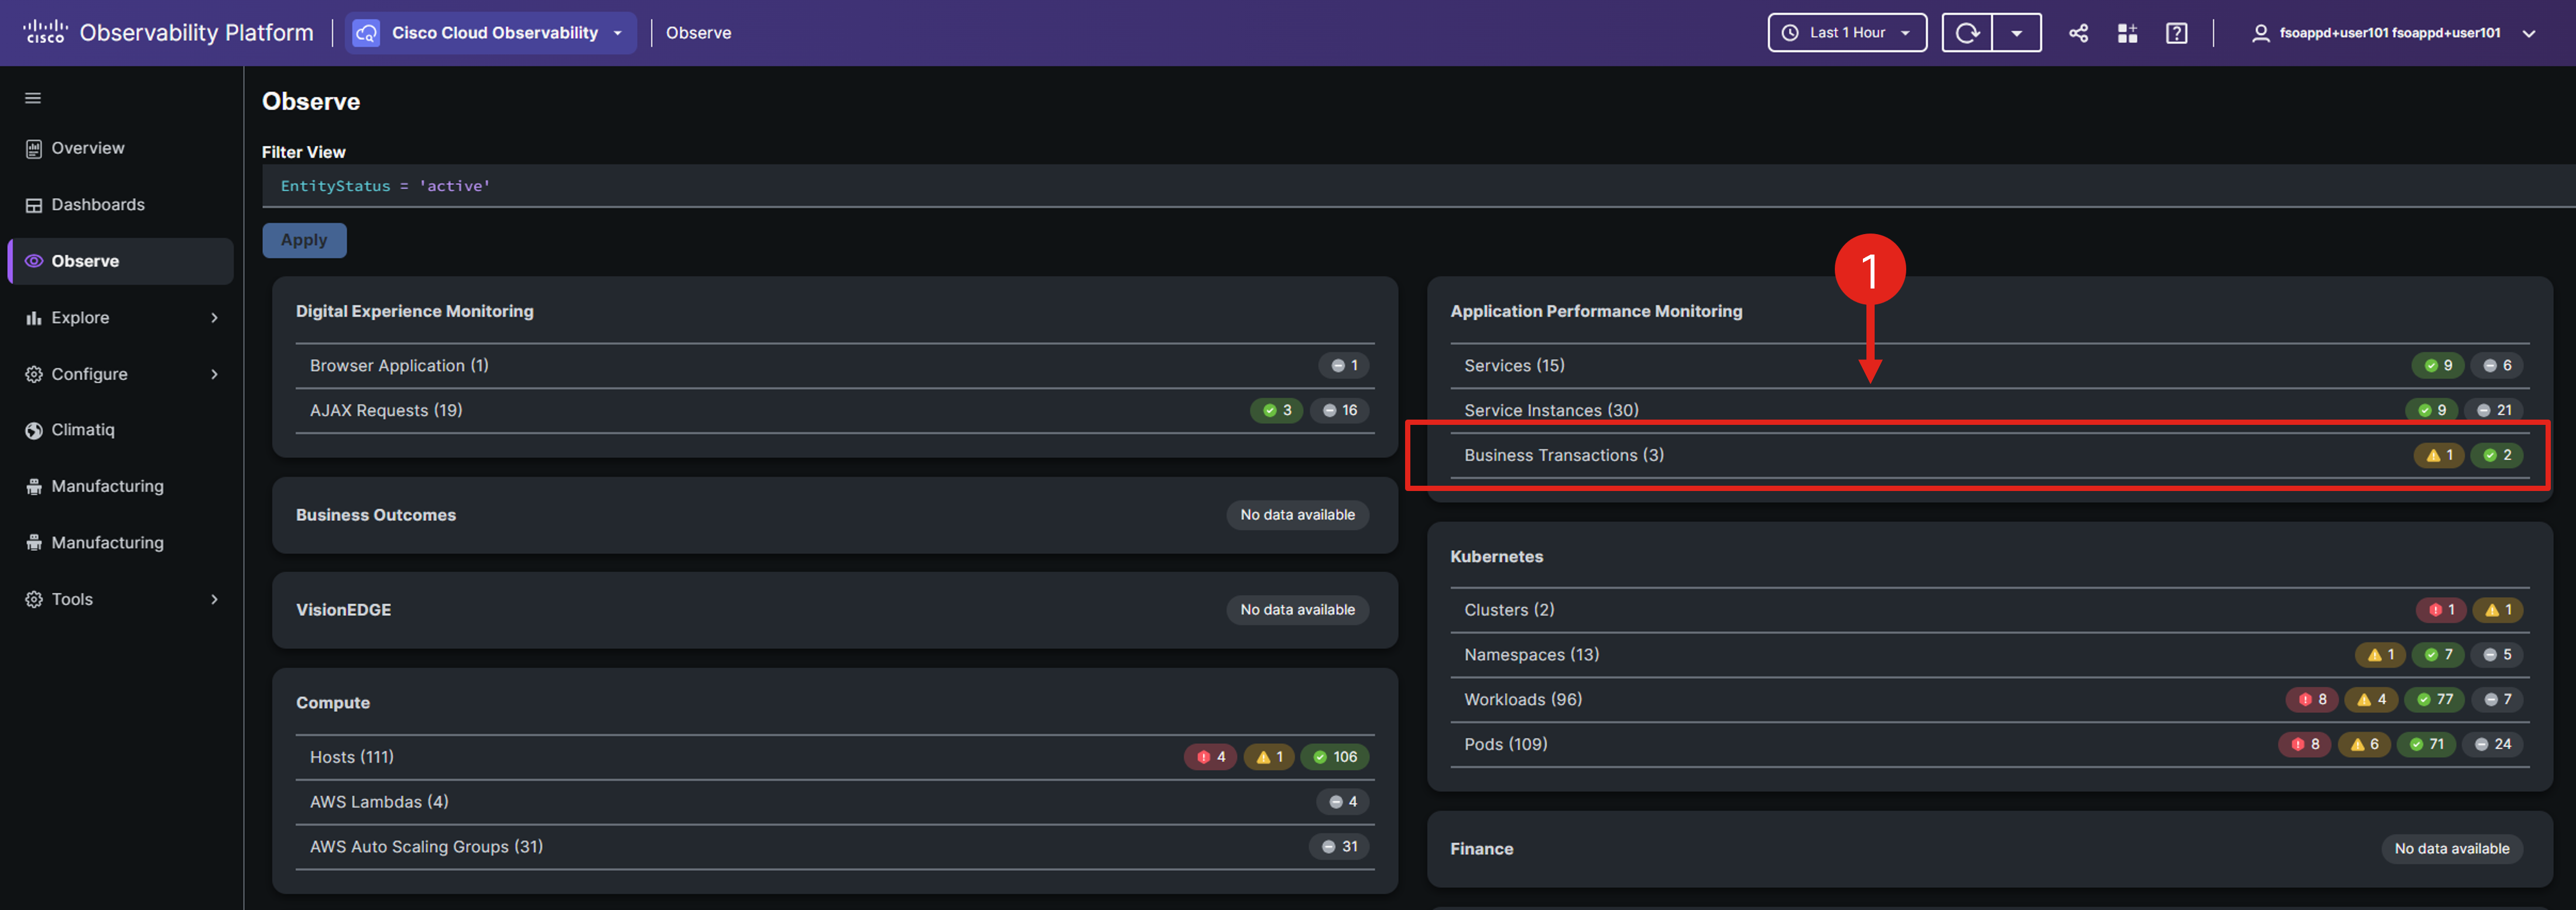
Go to the Observe page and click the Business Transactions entity within the Application Performance Monitoring domain.
Adjust the view to specifically target your cluster by appending && attributes(service.namespace) = 'cco_lab_id' to the existing filter. Ensure you replace cco_lab_id with the actual environment variable from your Cloud9 environment.
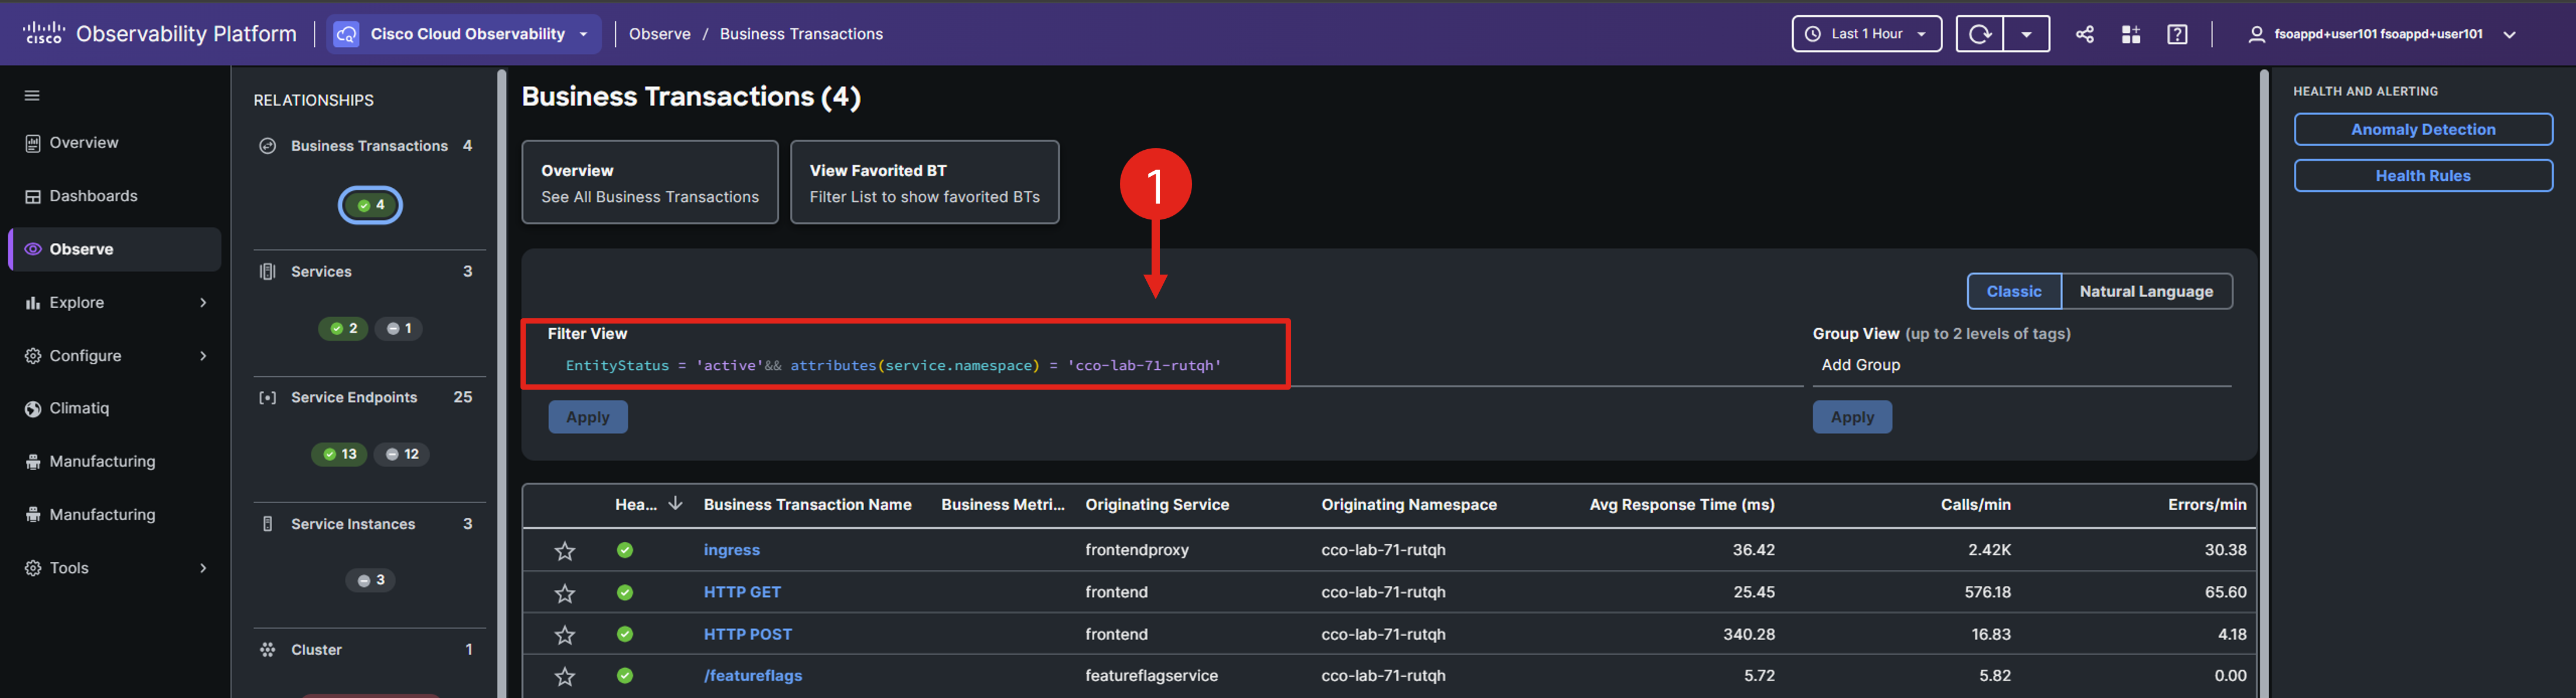
Choose the HTTP Post Business Transaction from the list.
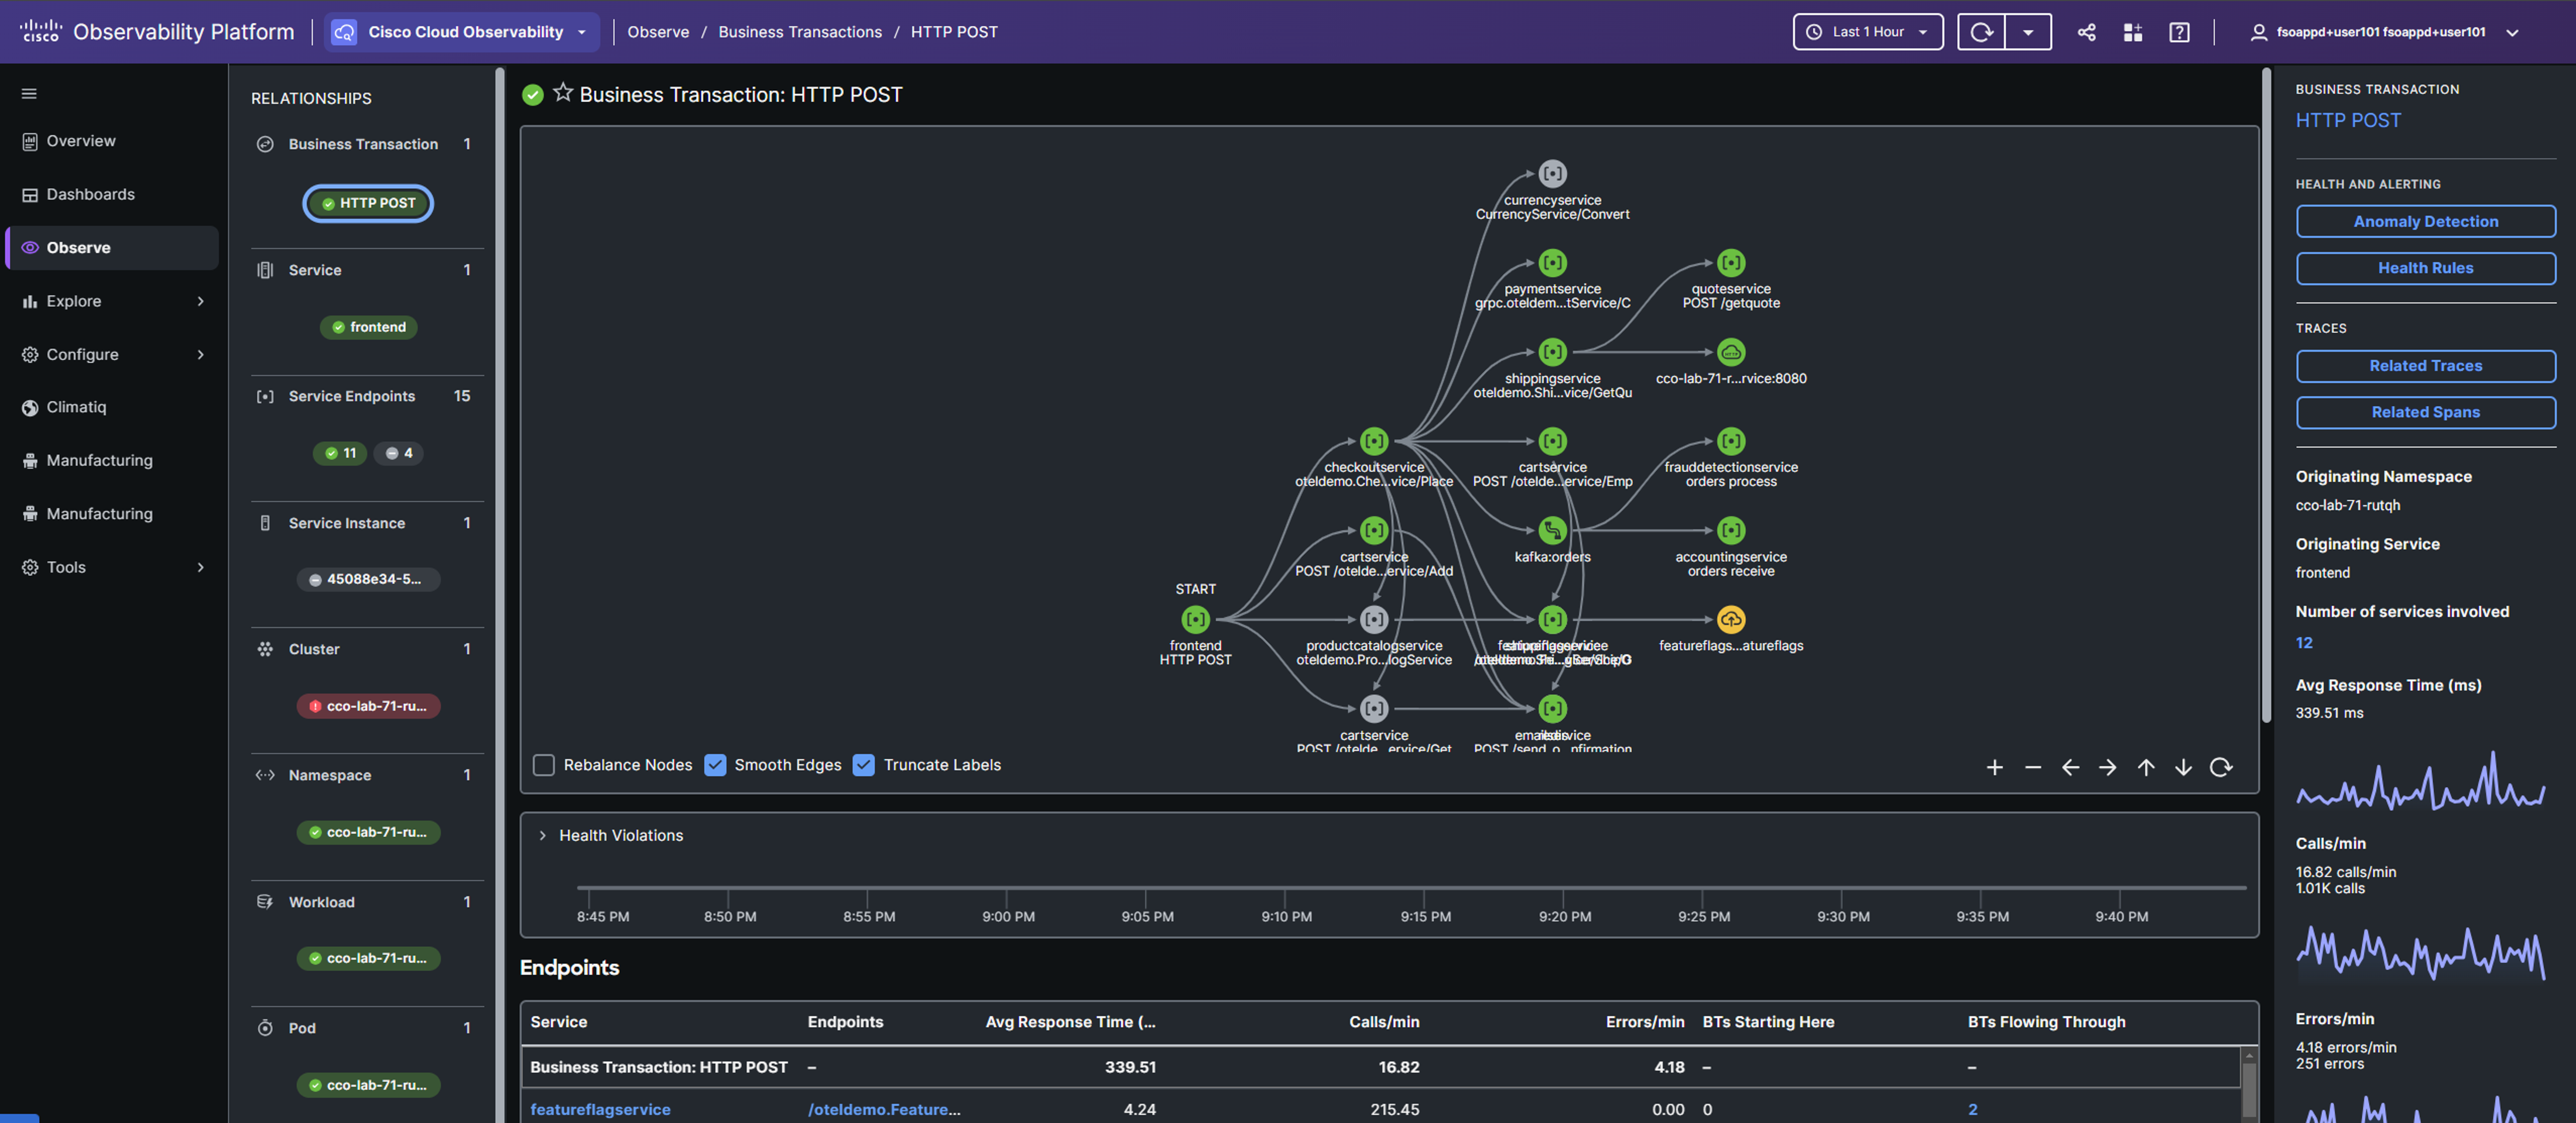
The Business Transaction detail page in CCO offers a distinctive approach to monitoring the health and performance of key business transactions, an essential aspect of your application monitoring strategy.
Cisco Cloud Observability incorporates service endpoints within Business Transactions flow maps, representing the entry and exit points for a service instance, which is the entity hosting the service.
Scroll down to see the metrics specific to the business transaction.
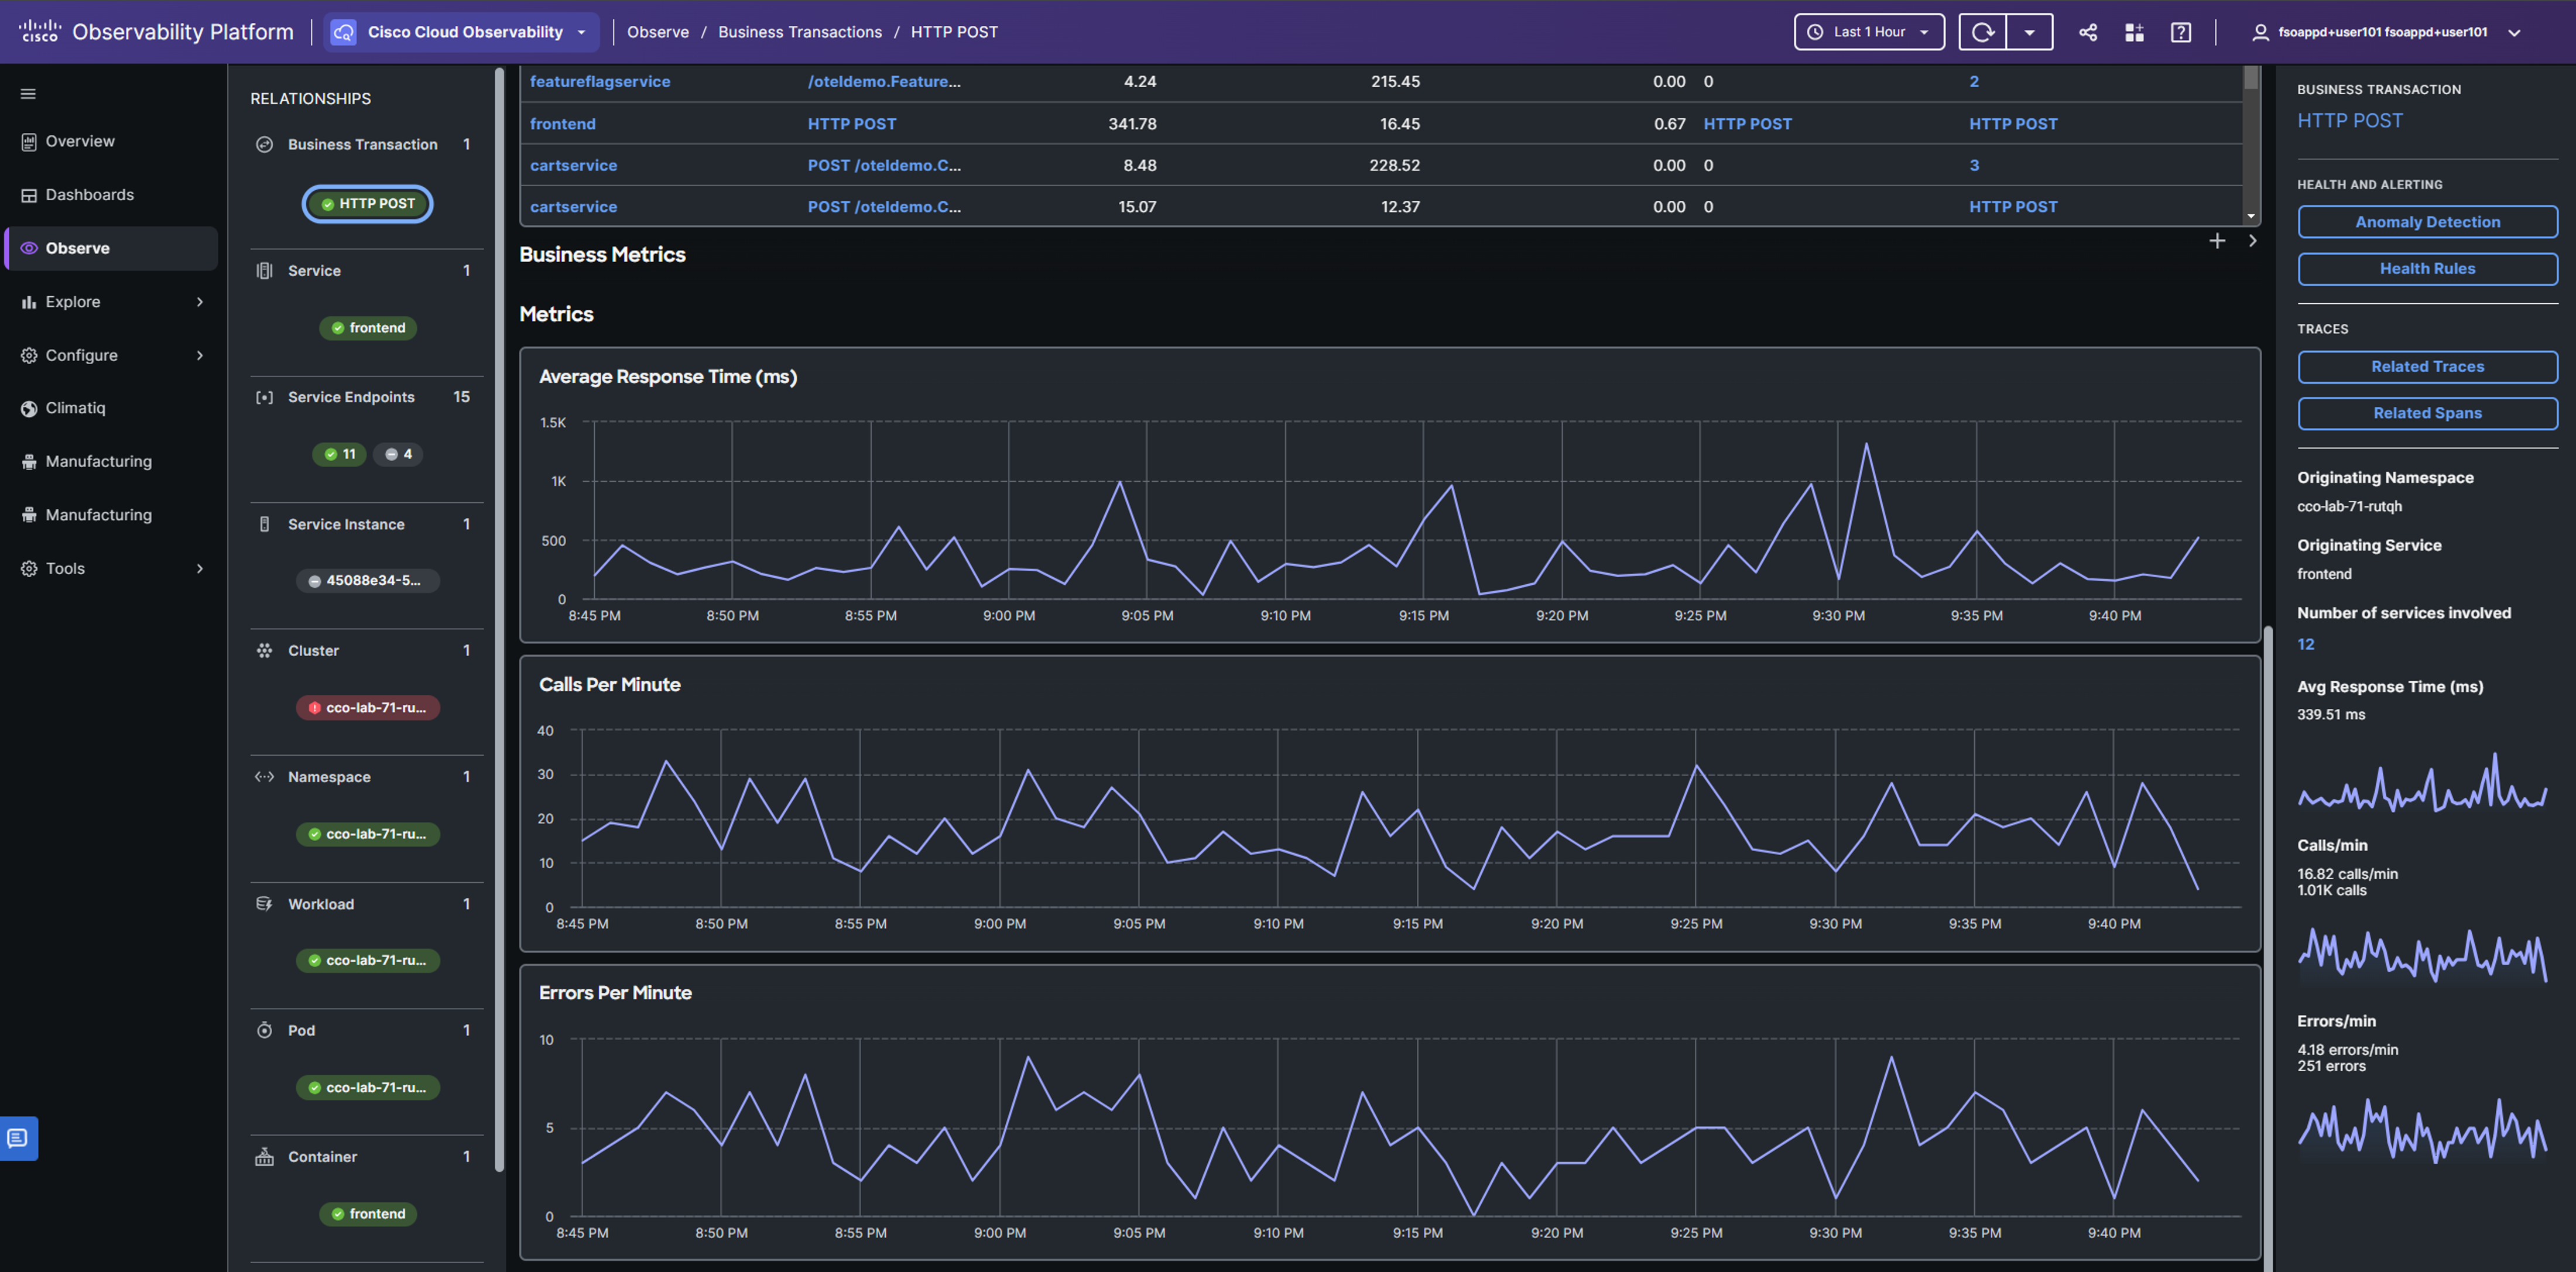
When you delve into the details, the Metrics graphs display data including Average Response Time in milliseconds, Calls per minute, and Errors per minute.
User Defined Business Transactions
As you explored the business transactions associated with your application, you might have observed that only three were automatically identified, and their scope was quite broad. For instance, a business transaction named HTTP POST lacks specificity, covering a wide range of transactions and services. Although CCO typically identifies business transactions automatically, there are instances where you need to define your own, tailored to your monitoring strategy for more meaningful insights.
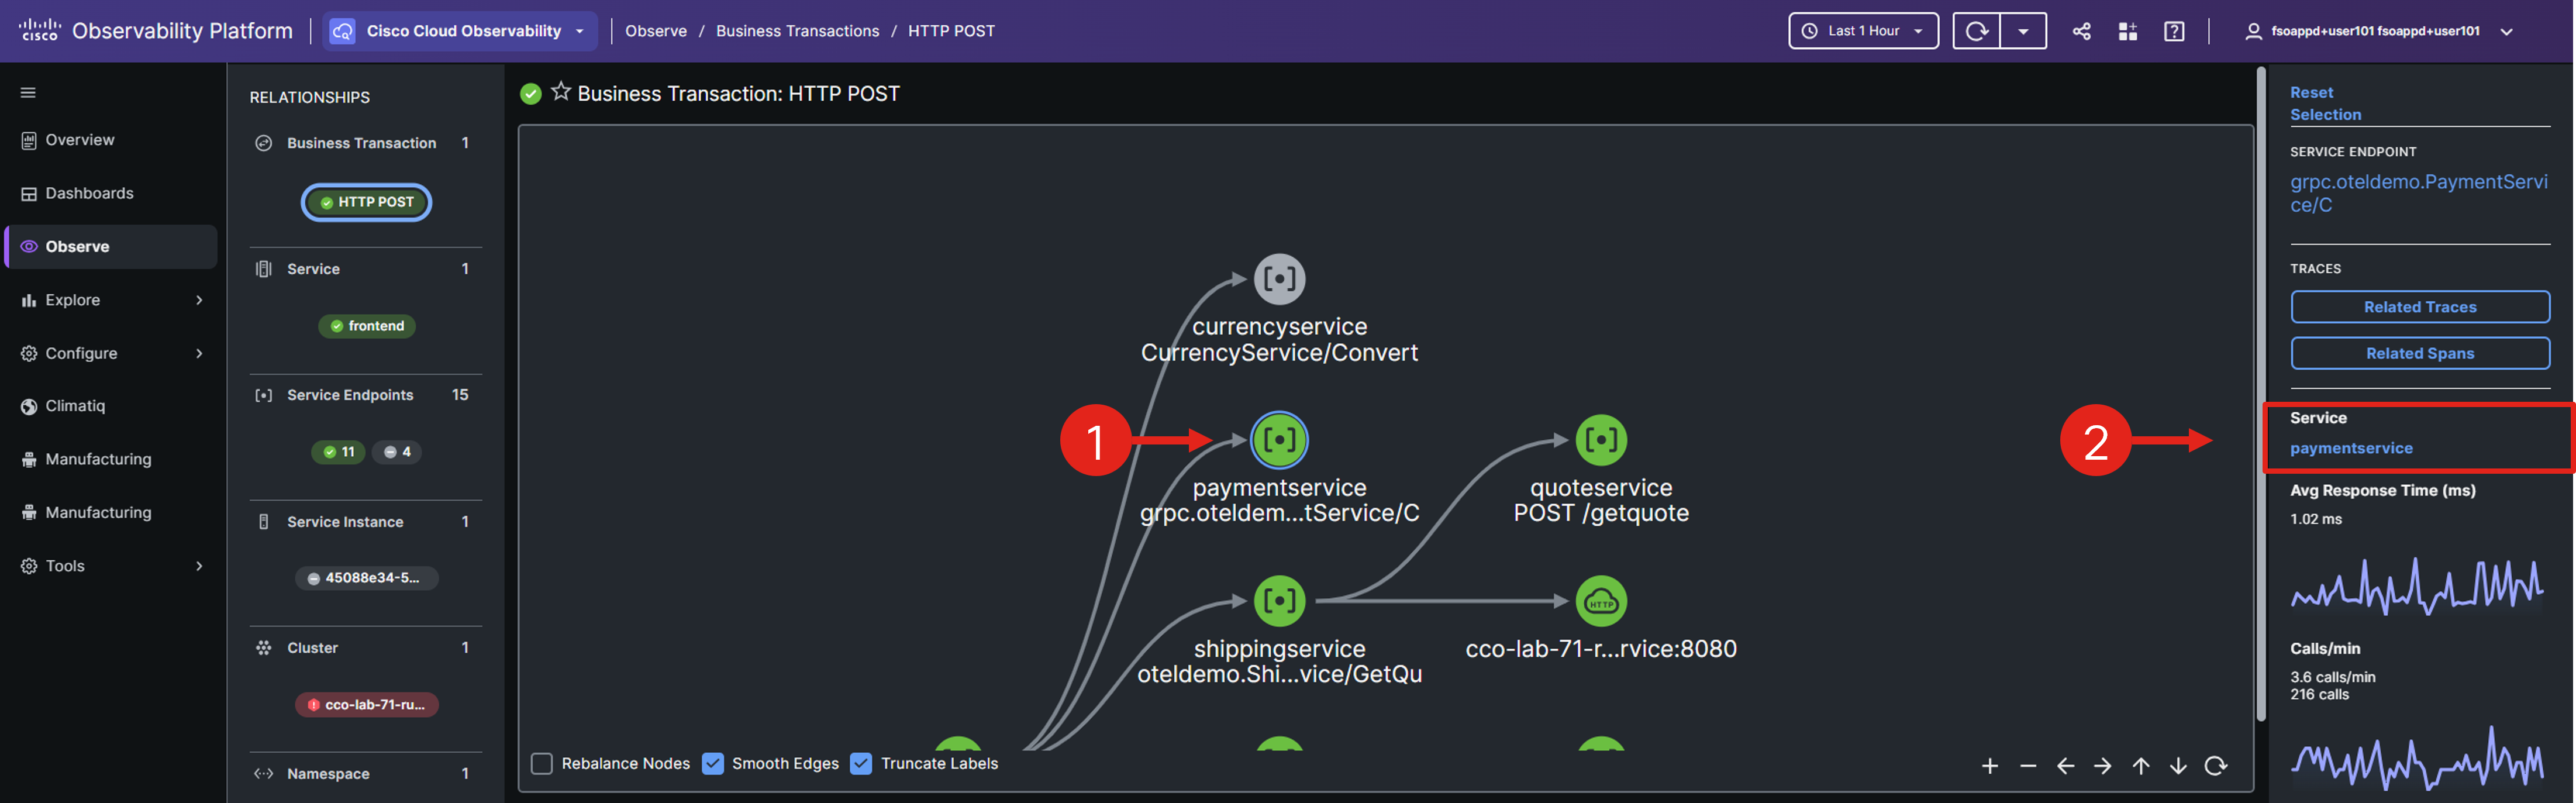
Return to the HTTP POST Business Transactions view if you navigated away from it after the previous section.
In the Business Transaction Flow Map, choose the paymentservice endpoint and click on the paymentservice link in the right-hand panel.
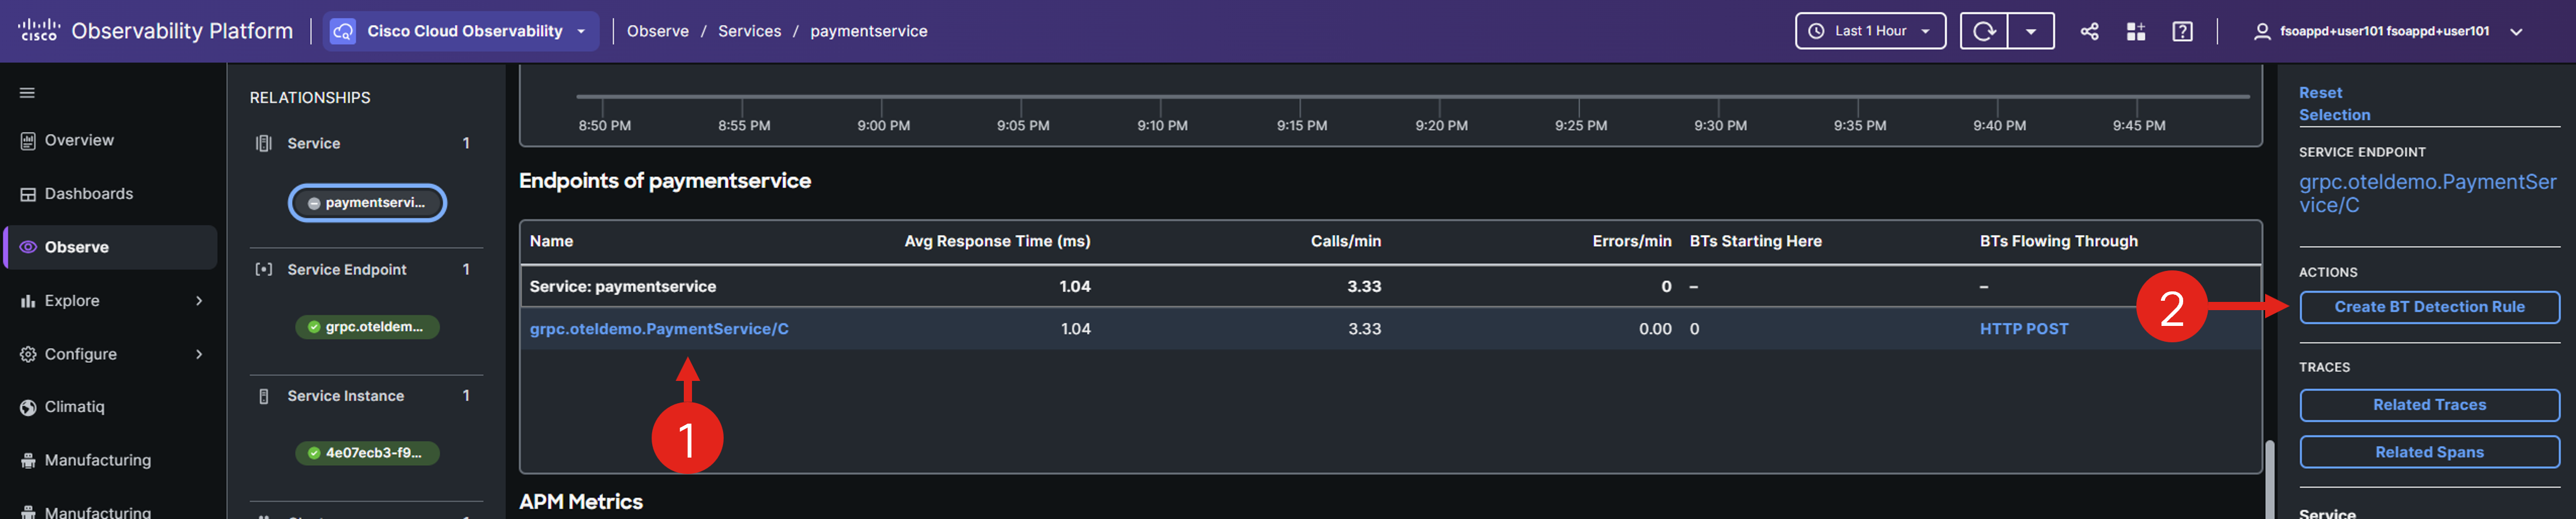
In the paymentservice Service Entity, scroll down to select the grpc.oteldemo.PaymentService/Charge endpoint and click on Create BT Detection Rule in the right panel.
Note: The name of the endpoint might in some cases be grpc.oteldemo.PaymentService/C.
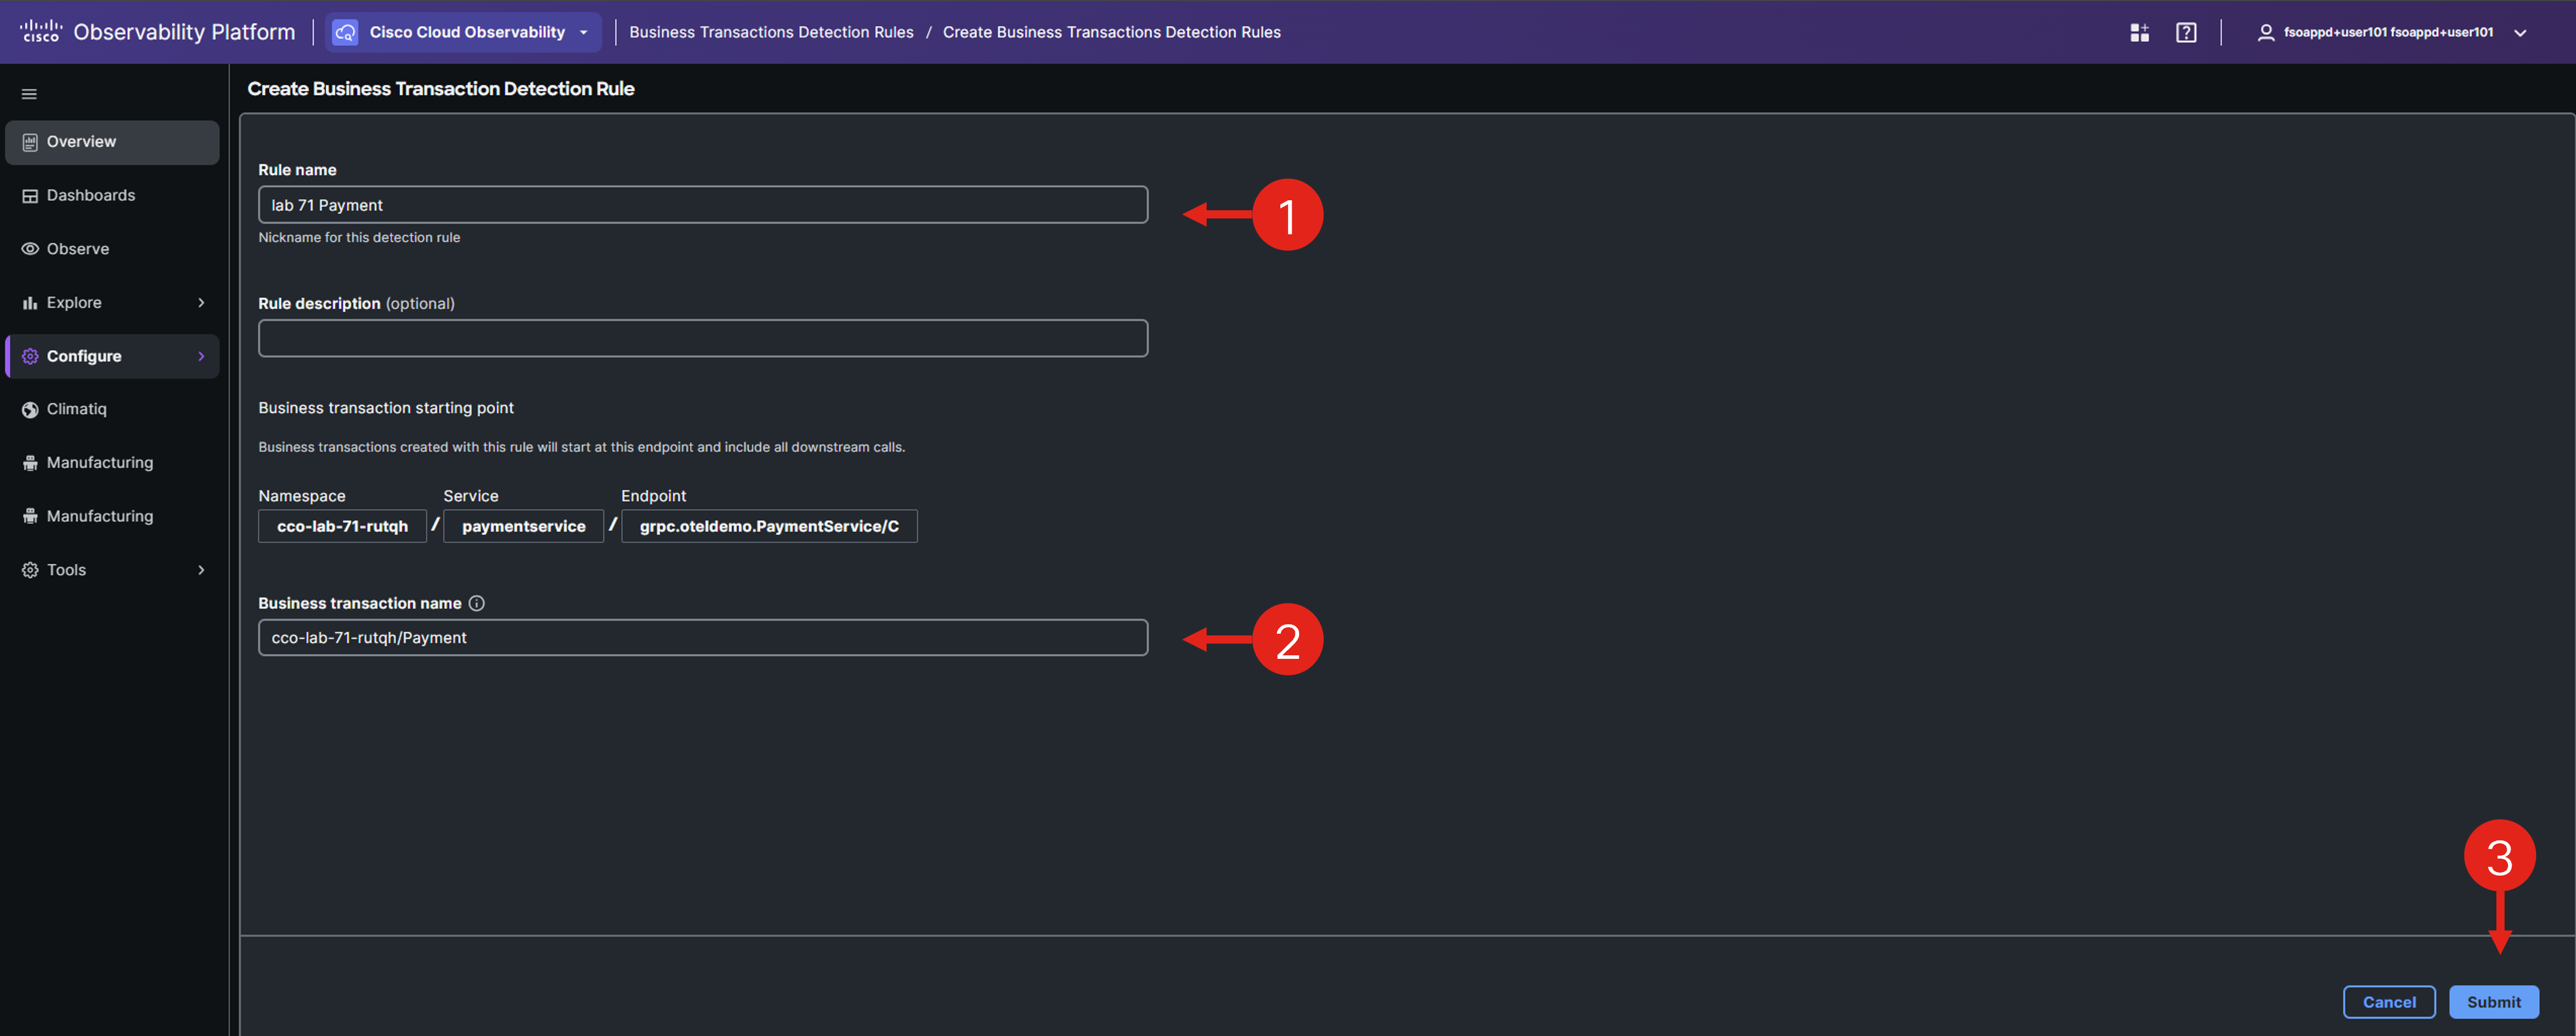
Enter the Rule name and Business Transaction name, incorporating your lab id in both. To find your lab id, run echo $cco_lab_id in the terminal of your Cloud9 environment. Submit the rule after you are done editing.
Note: Because you cannot use the lab id directly as the rule name, you can simply use just the lab number as part of the name.
Your new detection rule will now be visible in the list. Click on the name of your newly created Business Transaction to navigate to the transaction details view.

Note: It might take some time for Business Transaction to become available.
In the details view, you can examine the performance of the specific business transaction.
Business Metrics
Business Transactions can be linked with business metrics, enabling you to monitor the impact of application performance on business outcomes. Configure and visualize key metrics like Average Cart Value, Revenue Loss, Total Carts Sold, and Total Cart Value, and conduct segment analysis.
Return to the HTTP POST Business Transaction, navigate to the Business Metrics section and choose Configure Business Metrics.

Choose Sum for the metric type, select app.payment.amount as the attribute to monitor, and label the metric with a display name like Total Revenue.
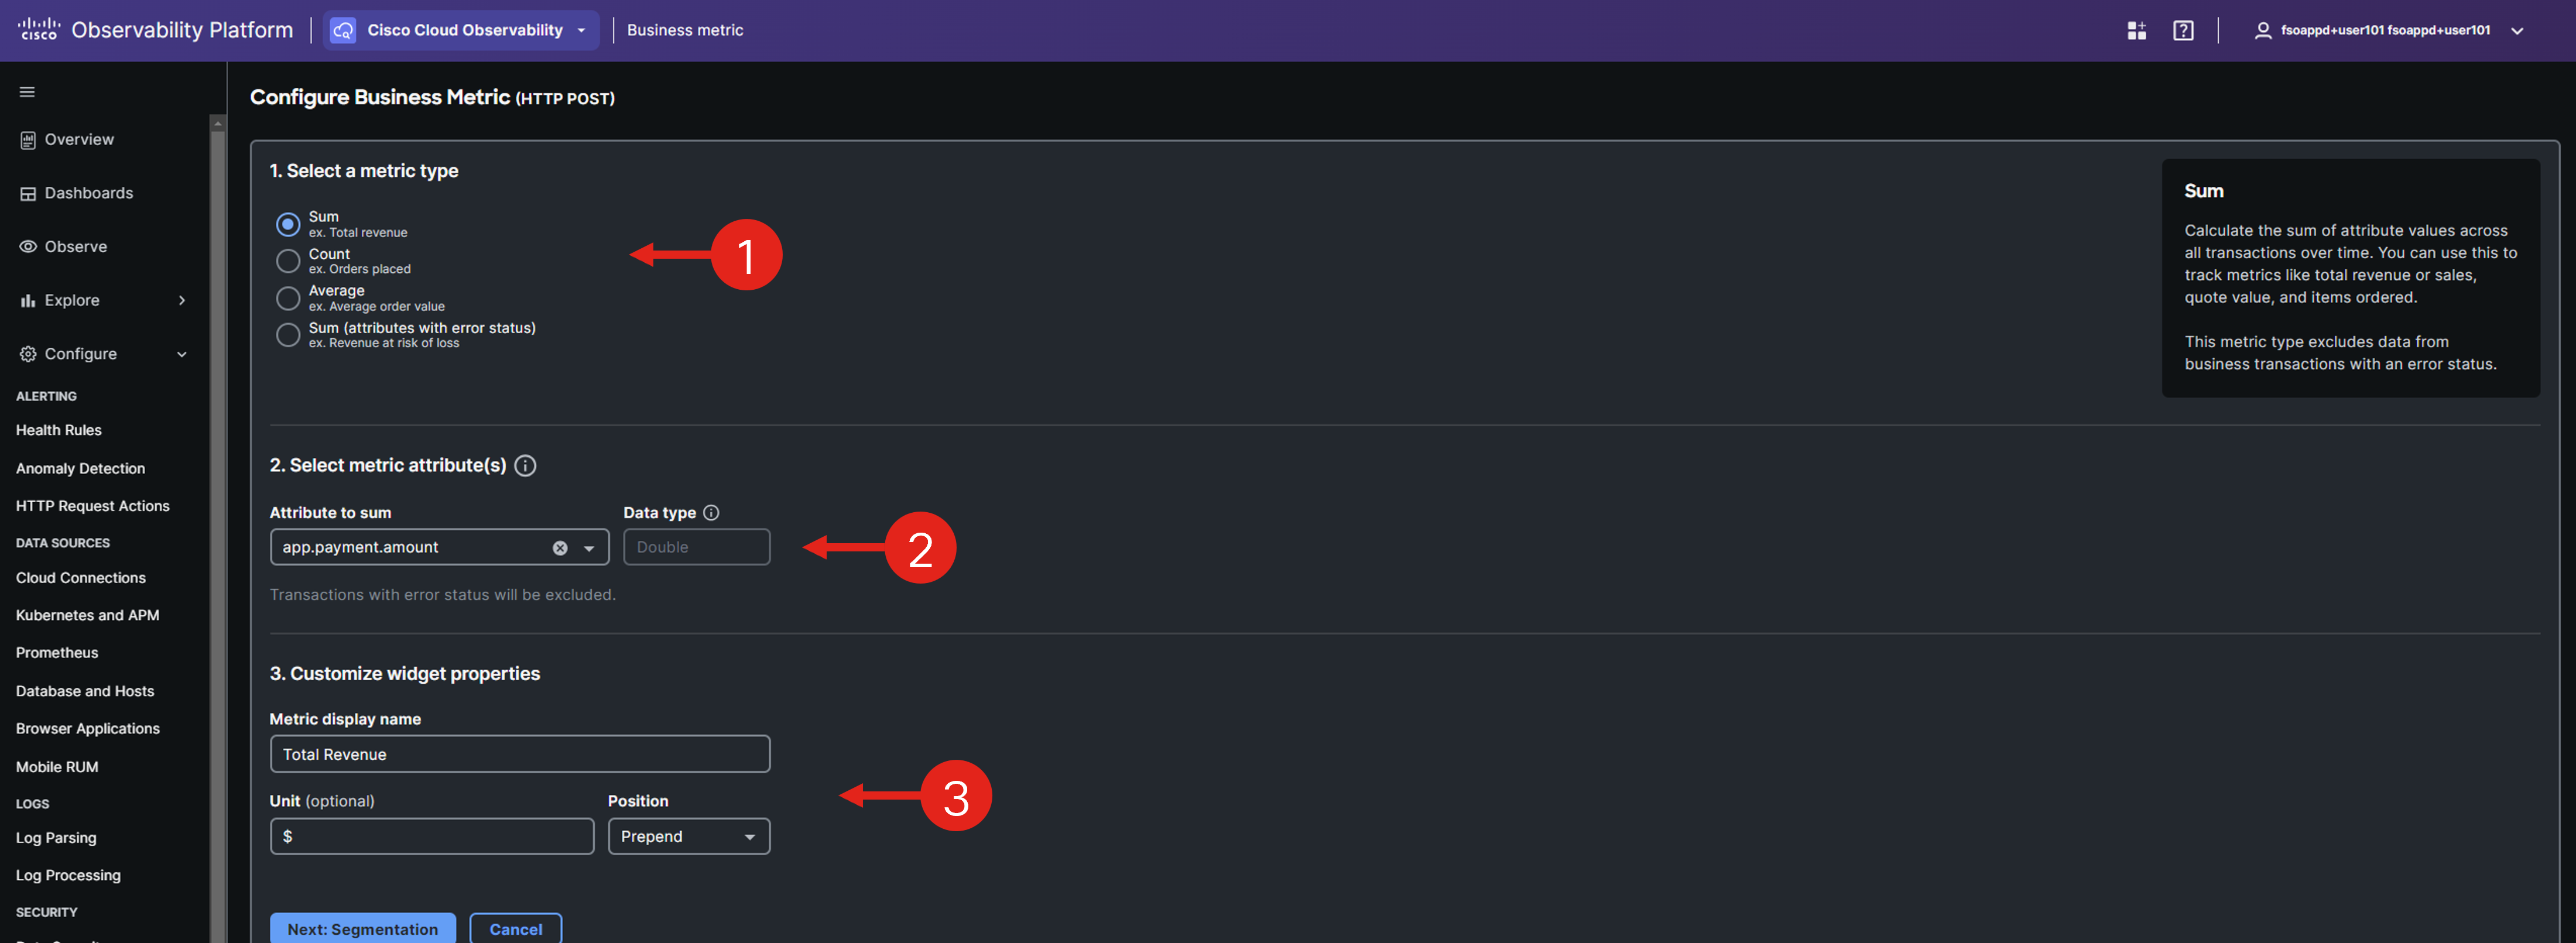
Note: The attributes are manually defined in the application code using the OpenTelemtry API.
Proceed with editing the business metric and choose the app.user.id attribute for segmenting payments, enabling you to filter them by user.
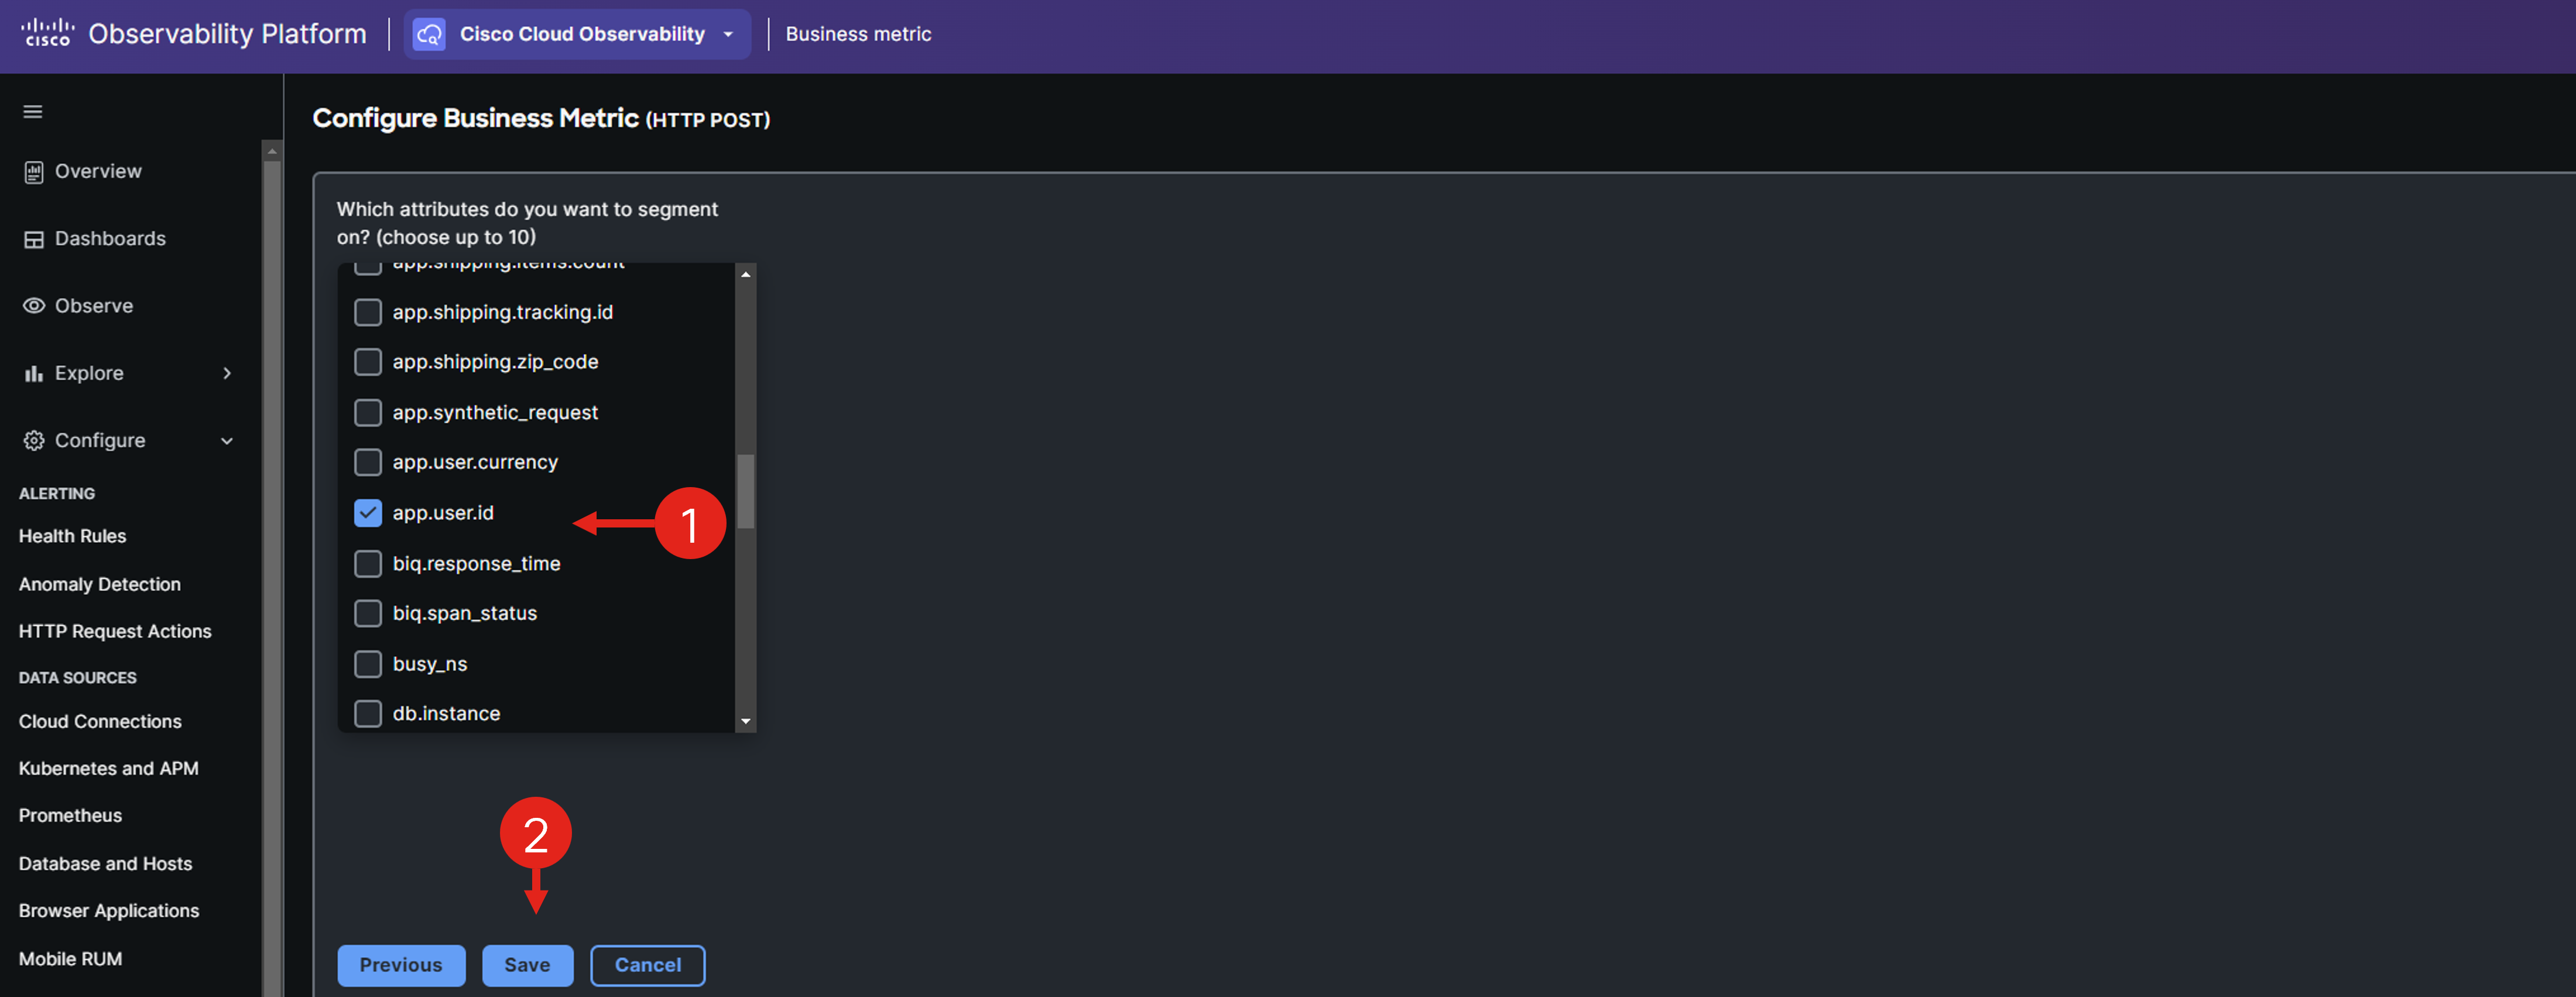
Save the business metric, then navigate back to your business transaction.
Open the business transaction details and navigate to Business Metrics.
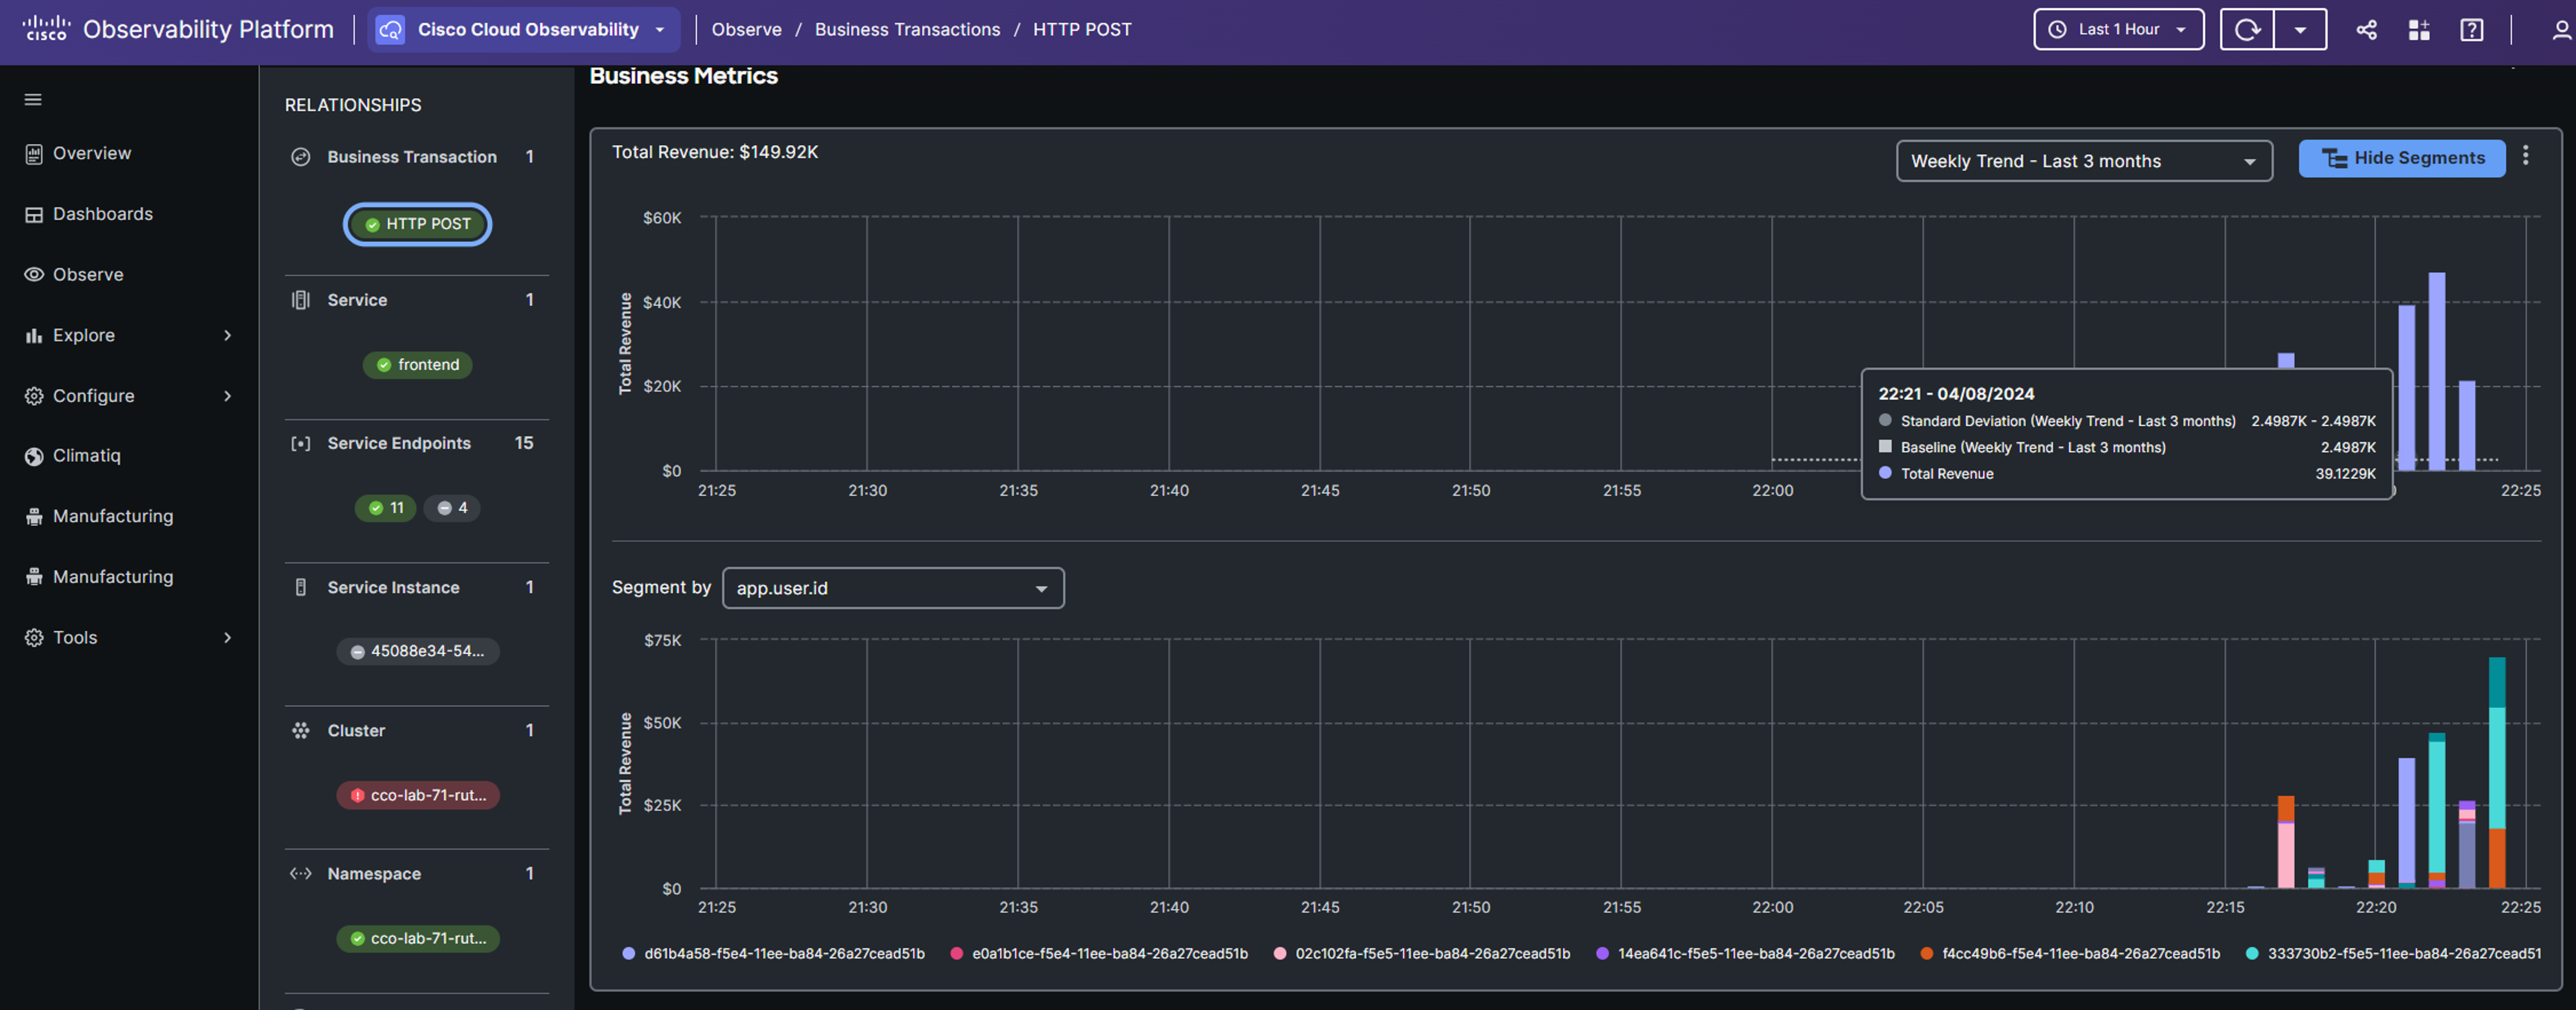
You should observe incoming business metrics like Total Revenue, and segment revenue by user to identify your most loyal customers.
Note: It may take a few minutes for business metrics to appear. Use the time selection tool in the upper-right corner to narrow the view to the last 5 or 15 minutes and observe incoming data.
You have successfully set up custom business transactions, specifically designed to meet your business monitoring requirements.