Lab Access
You access the lab environment through an AWS-hosted Cloud9 instance, which gives you a fully configured workspace right in your browser. Make sure to obtain your CCO Lab User Credentials before the class starts. If you haven’t acquired them yet, reach out to your instructor for guidance.
Below is a list of crucial URLs and credentials required for seamless access to the lab. Ensure you have received all the variables mentioned:
URLs:
- AWS Login URL: provided by instructor
- Cloud9 Lab URL: provided by instructor
- CCO Tenant URL: provided by instructor
Credentials:
- AWS Username: provided by instructor
- AWS Password: provided by instructor
- AWS Region: provided by instructor
- CCO Tenant Username: provided by instructor
- CCO Tenant Password: provided by instructor
The URL and Credentials variables will be cited in the relevant sections of the instructions as required.
AWS Cloud9 Login Instructions
Here are the guidelines for accessing your AWS Cloud9 instance, which will serve as your lab environment for the duration of this course.
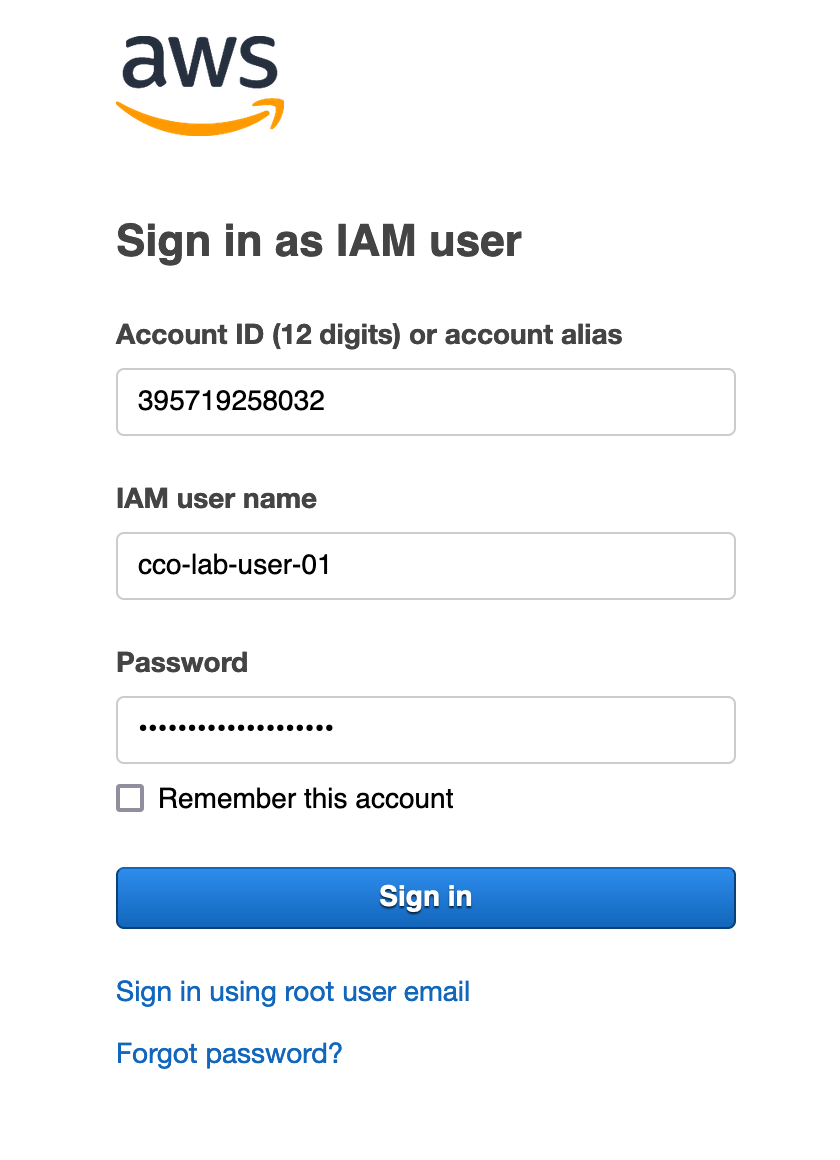
In your browser, open a new tab and copy and paste the AWS Login URL to navigate to the AWS Console Sign in as IAM user page.
Copy and paste your assigned lab IAM user name and Password credentials into the appropriate fields and click the Sign in button.
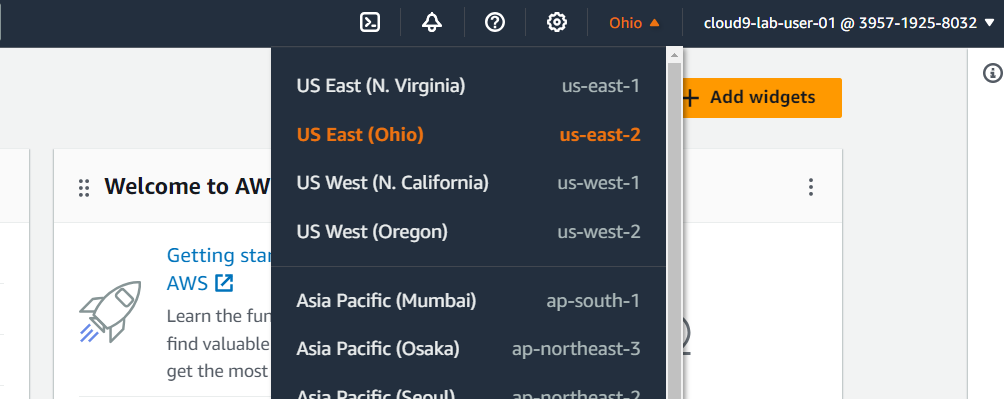
Navigate to the upper-right corner of the AWS Console and verify that the region selected is the AWS Region assigned to you, as in this example for ‘US East (Ohio)’ below.
Open a new tab in your browser and copy and paste your assigned Cloud9 Lab URL to access your CCO Lab environment. Your Cloud9 environment will look similar to the image below.
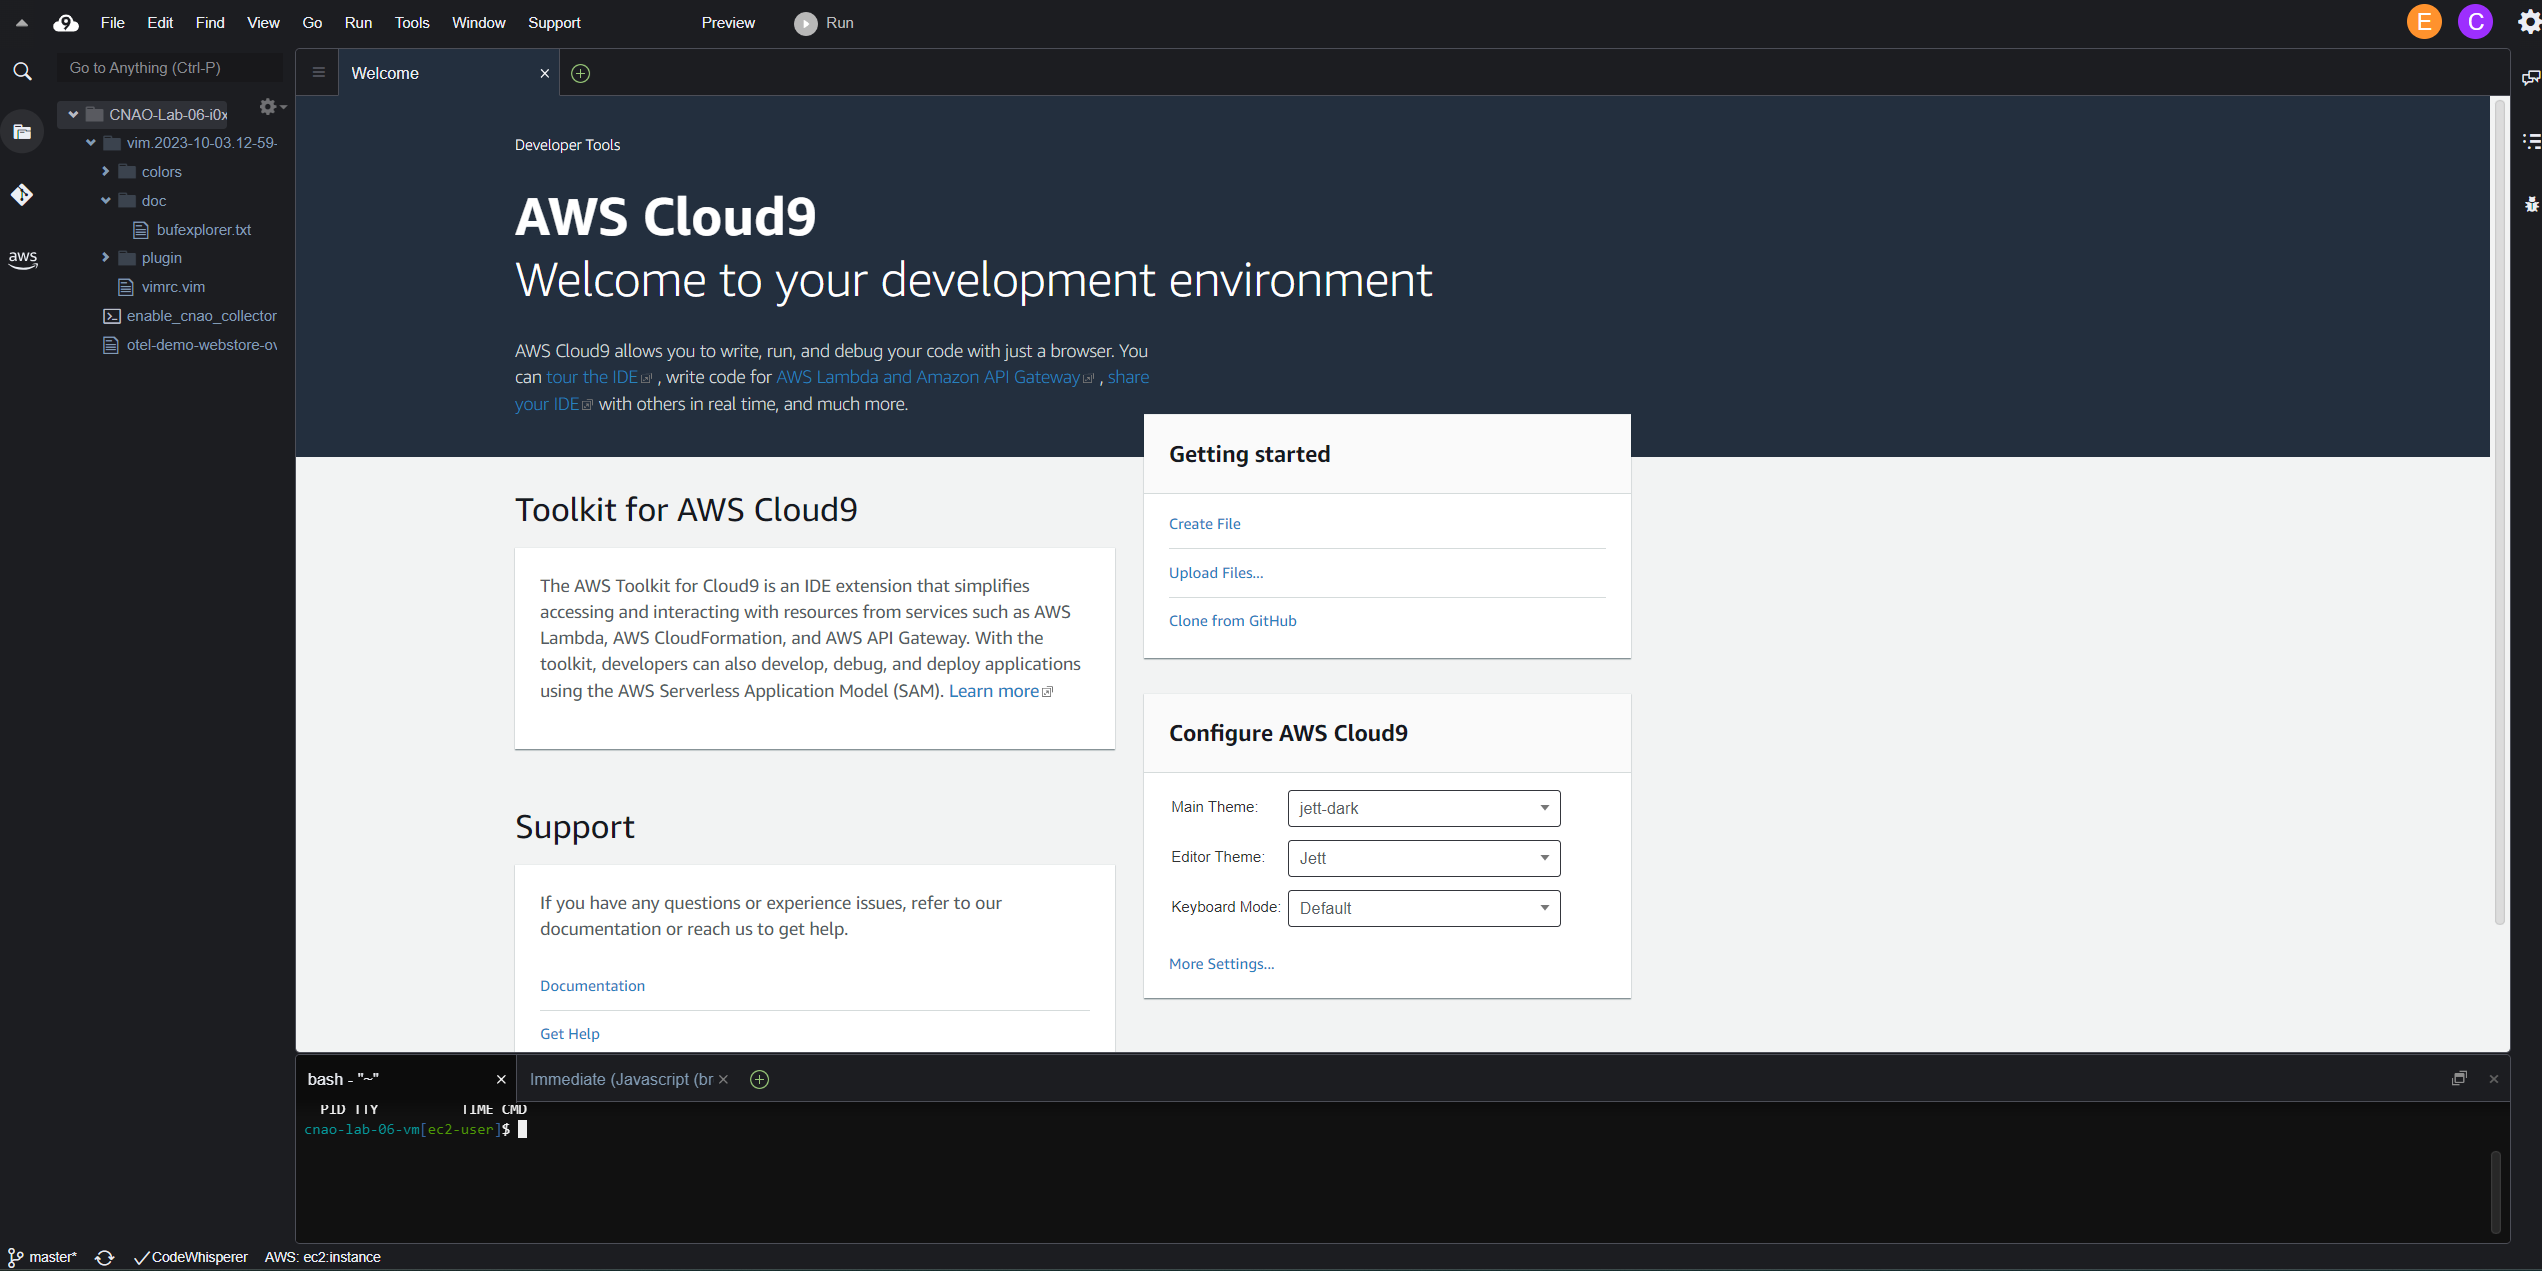
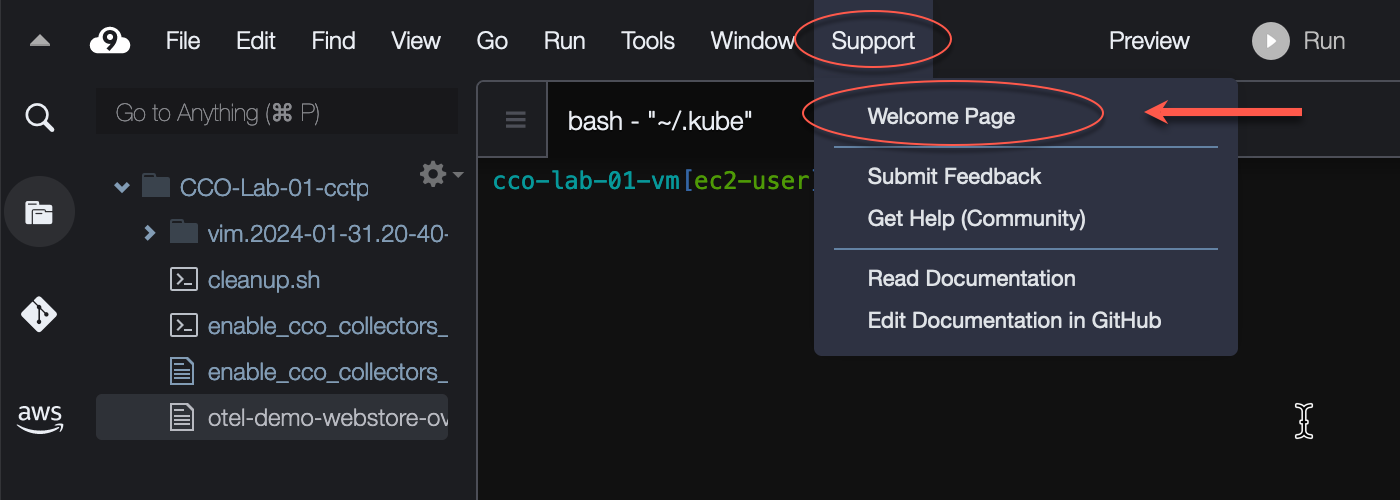
Note: You have the option to customize the look of your Cloud9 instance via the initial Welcome page. If you don’t see the Welcome page, you can open it by selecting Support –> Welcome Page.
Validate CCO Workshop environment variables
About your Cloud9 environment variables
Each Cloud9 Lab VM will have a set of custom environment variables unique for each participant. This allows us to keep the workshop commands uniform in the lab guide while ensuring that your deployed resources are uniquely named and can be distinguished from other lab users.
- cco_lab_number: CCO Lab number of the Cloud9 VM instance. Verify that it matches the Lab number assigned to you. There are other queues as well, such as the name of your Cloud9 environment and the terminal prompt.
- aws_region_name: AWS Region of your Cloud9 VM instance and EKS Cluster. Verify that it matches the AWS Region assigned to you.
- aws_eks_cluster_name: The name of your EKS Cluster in mixed case. Used by the AWS CLI utility to pull down your kubeconfig.
- cco_k8s_apm_name: The name of your EKS Cluster in all lower case. Used by you in the CCO Tenant to name your data collectors and Kubernetes cluster. Please don’t confuse this environment variable with aws_eks_cluster_name.
- cco_lab_id: A unique lab ID based on the cco_k8s_apm_name without the trailing -eks. Used by Kubernetes as a namespace for deploying the OTel Demo application.
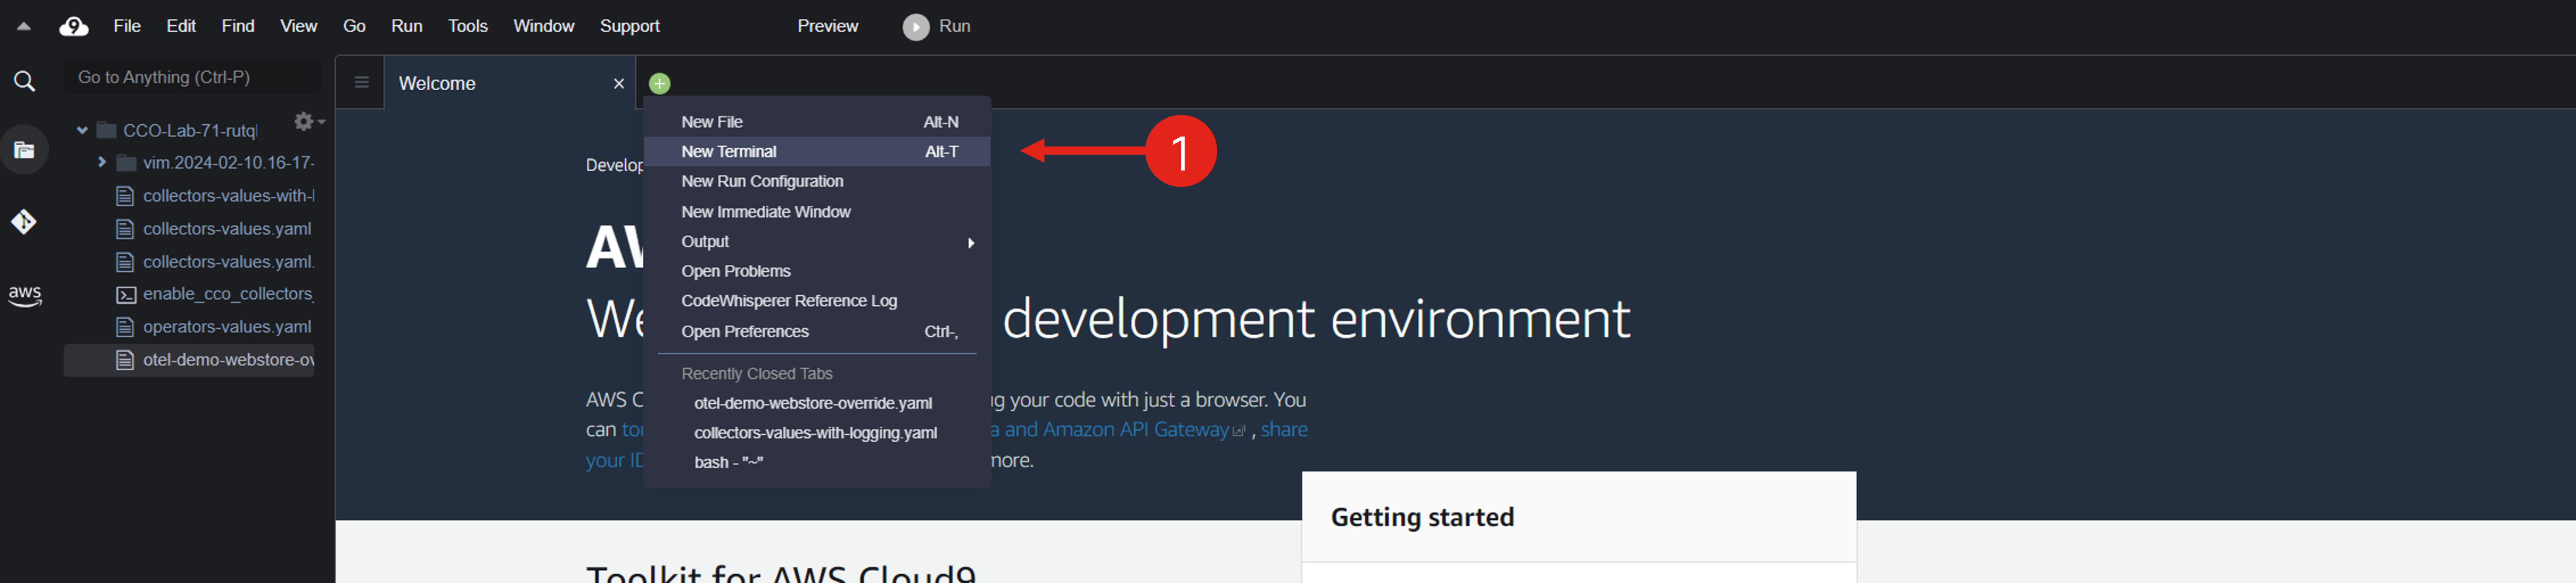
To open a new terminal window in your Cloud9 instance, click the plus sign (+) in the central pane and then select New Terminal.
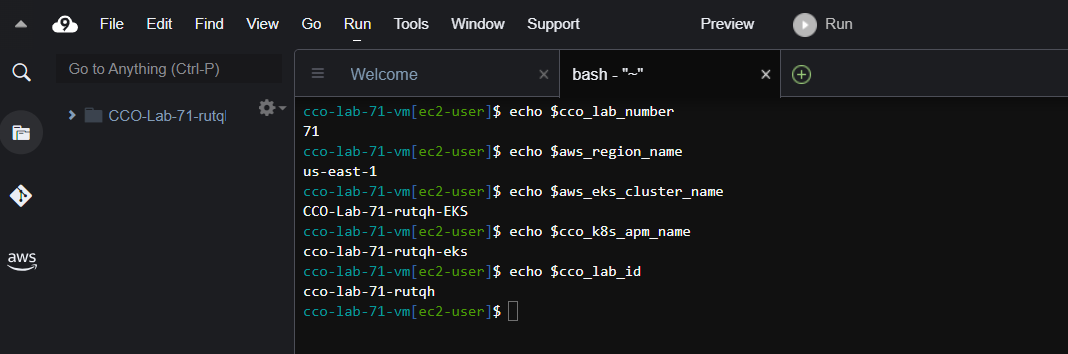
Next, verify that all required environment variables are set in your instance. You will use some of the variables in the following exercises, so make sure all are set. Copy and paste the following commands into the terminal window you created in the previous step.
echo $cco_lab_number
echo $aws_region_name
echo $aws_eks_cluster_name
echo $cco_k8s_apm_name
echo $cco_lab_id
Below is an example of the output. The output of the variables in your instance will be different.
You have successfully accessed and verified your lab environment!
Coming Up Next
In the next section, you will learn how to generate and retrieve configuration files required to connect the system under observation with Cisco Cloud Observability (CCO) platform.