Prepare Configuration Files
Configure Kubernetes and Application Performance Monitoring
The initial step in configuring Kubernetes and application monitoring involves creating credentials and generating a series of Helm charts. These charts are essential for deploying the components needed for cluster monitoring. The Cisco Cloud Observability (CCO) platform offers a guided, step-by-step methodology to walk you through the entire procedure.
Use a new browser tab to access the CCO tenant using the CCO Tenant URL and log in with the provided credentials.
After you log in, you’ll arrive at the Observe page, which serves as the launching pad for the monitoring tasks you will perform later.

Note: Your view might be different from the above image, because you are using a shared tenant.
Use the left navigation pane and navigate to the Kubernetes and APM menu.
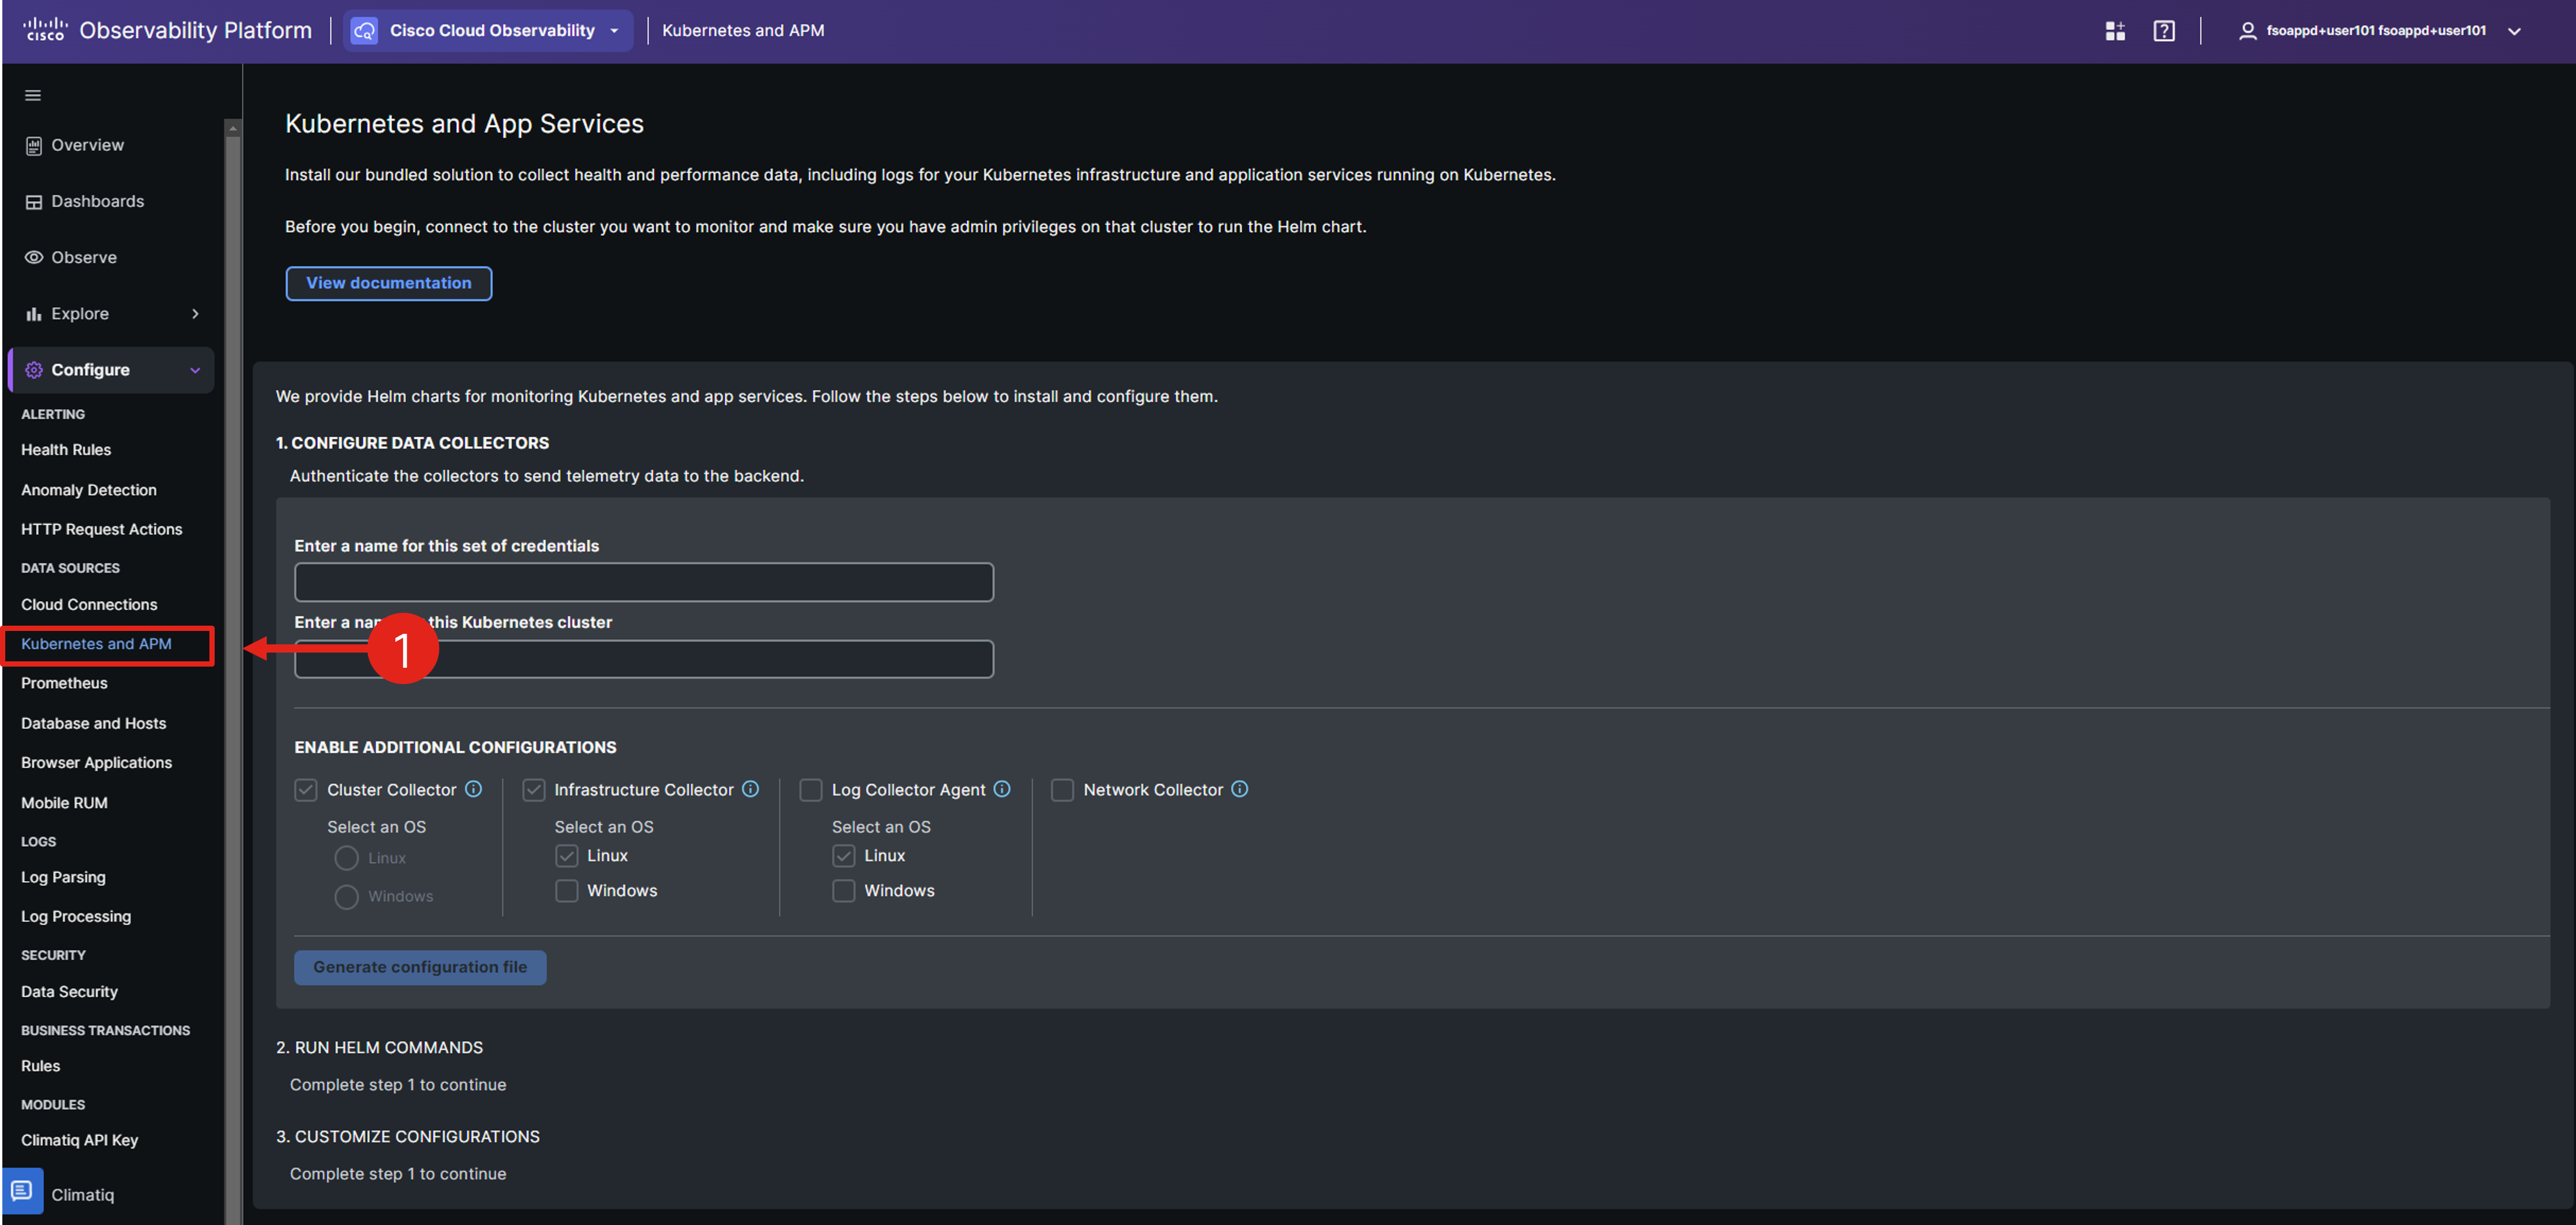
Here, you’ll generate your own set of credentials, which will be used for setting up Kubernetes and APM data collectors.
In your Cloud9 environment’s terminal window, run the echo command to retrieve the value of the cco_k8s_apm_name environment variable.
echo $cco_k8s_apm_name# example
$ echo $cco_k8s_apm_name
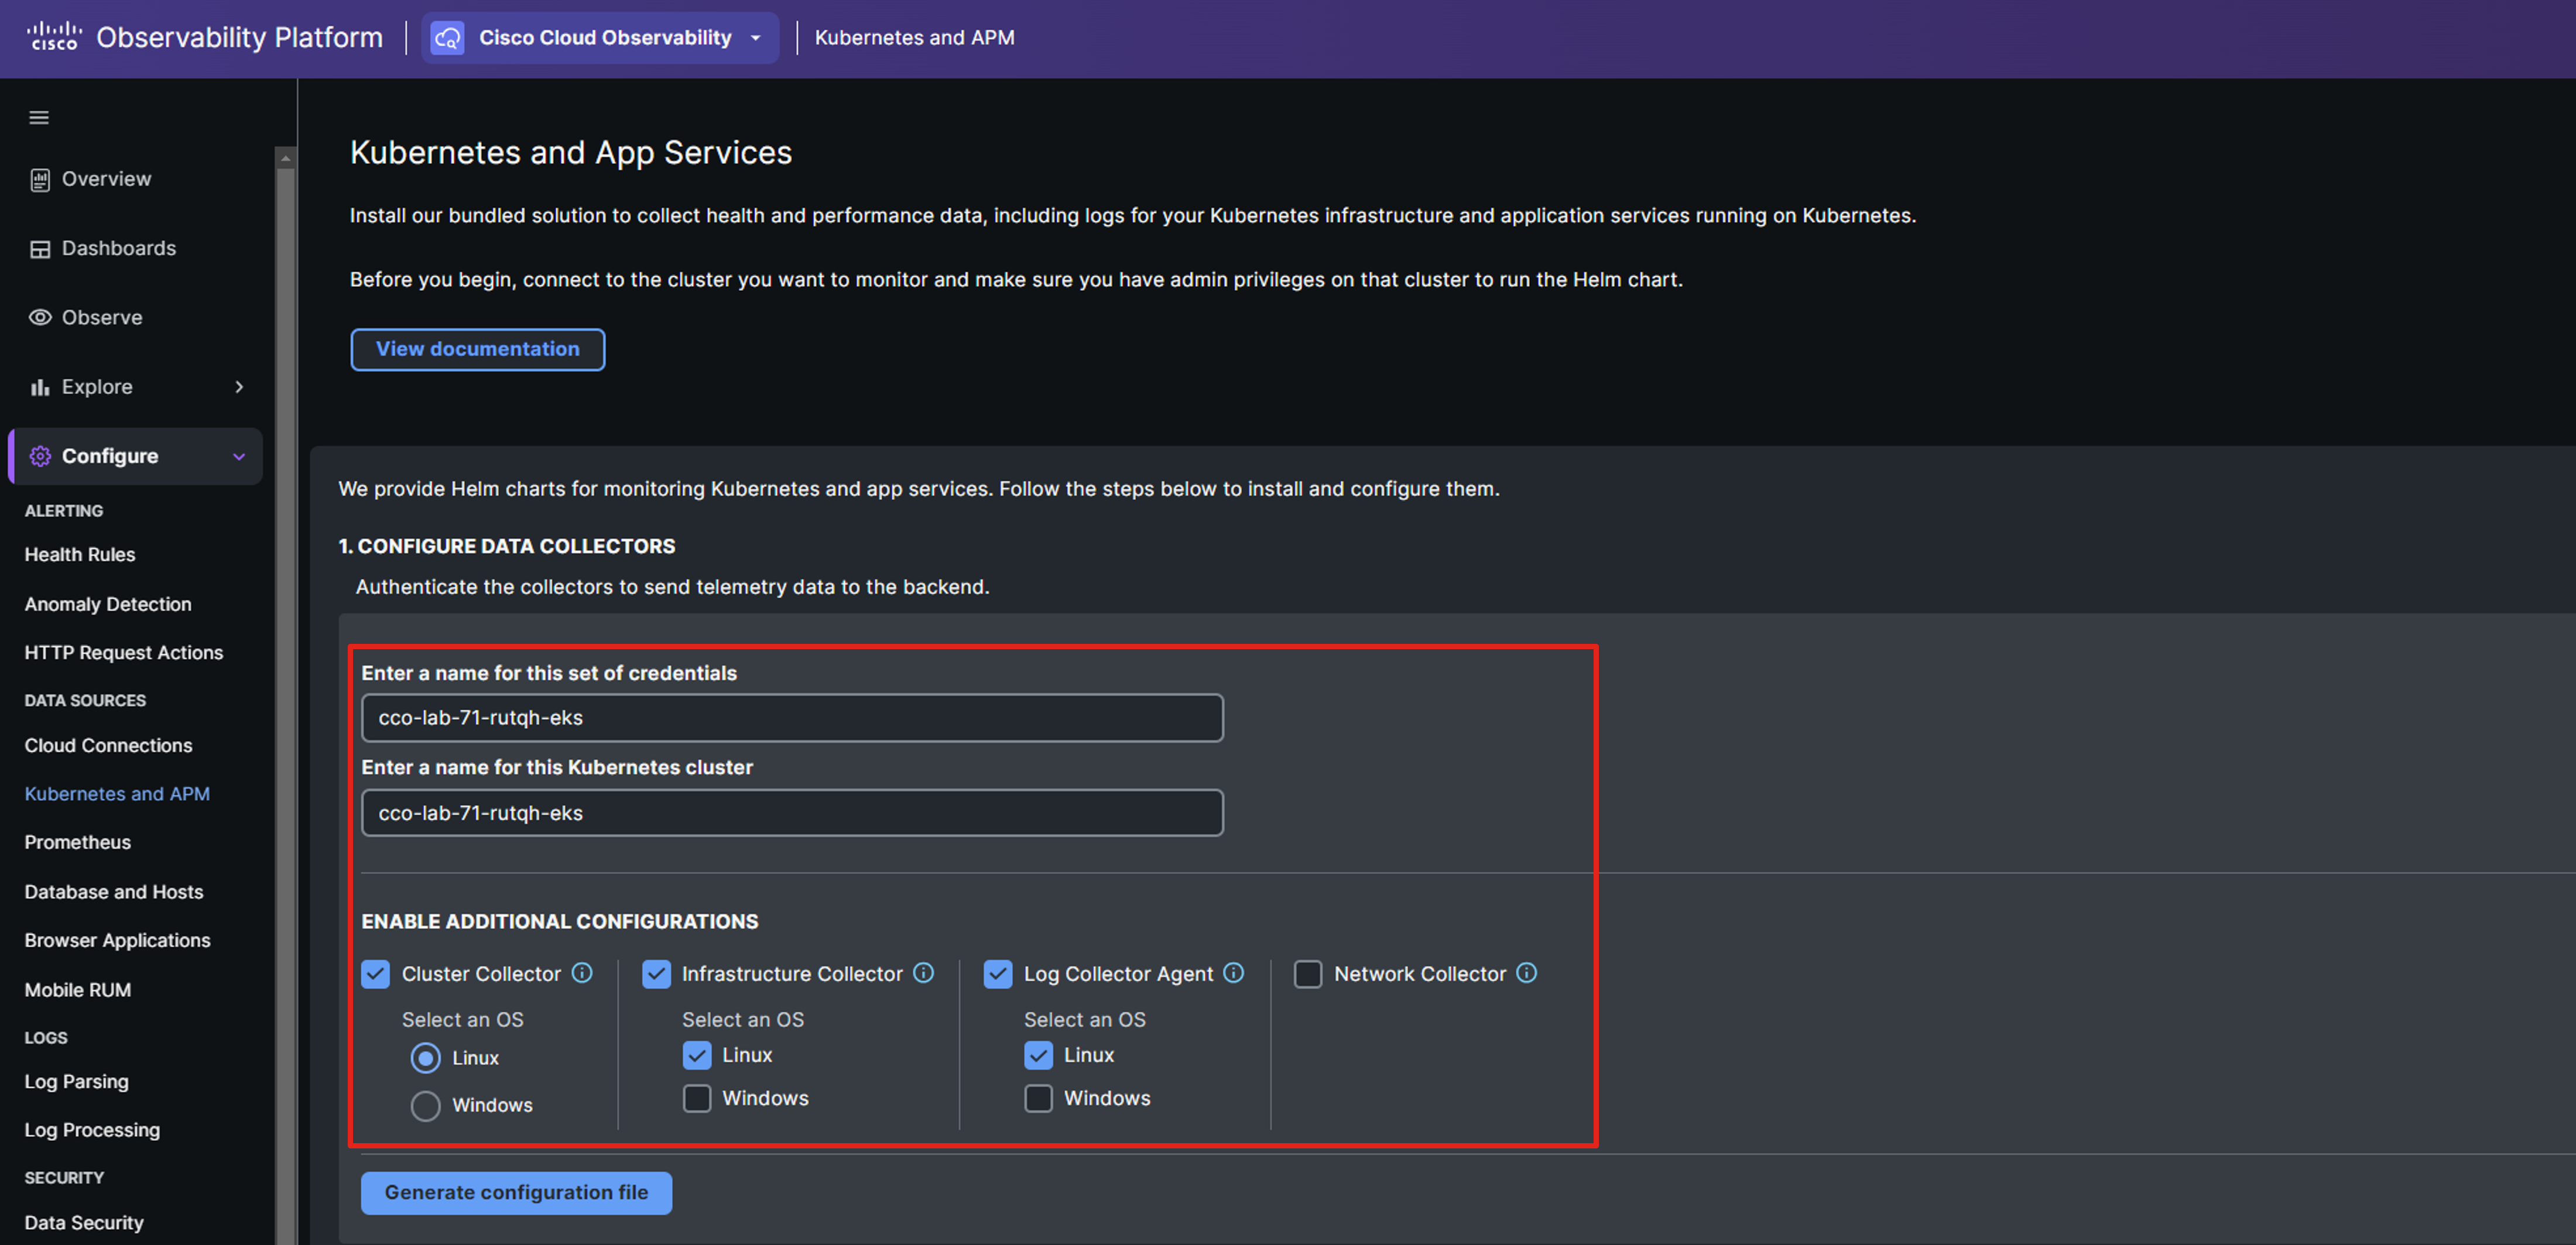
cco-lab-01-nrmf4-eksUse the value of cco_k8s_apm_name for both the credential set name in the first field and the unique name of the Kubernetes cluster in the second field.
In the ENABLE ADDITIONAL CONFIGURATIONS section, ensure that Cluster Collector, Infra Collector, and Log Collector Agent are all selected, choosing Linux for the OS option where applicable.
If Security Monitoring is also present, select that as well.
Note: If Secure Application is NOT enabled for your CCO tenant, it will not show up in the configurations section, and you can safely ignore the Lab Guide instructions related to Security and Security Monitoring.
Below is an example showcasing both values configured. Make sure to use your own data in the input fields.
Click the Generate configuration file button.
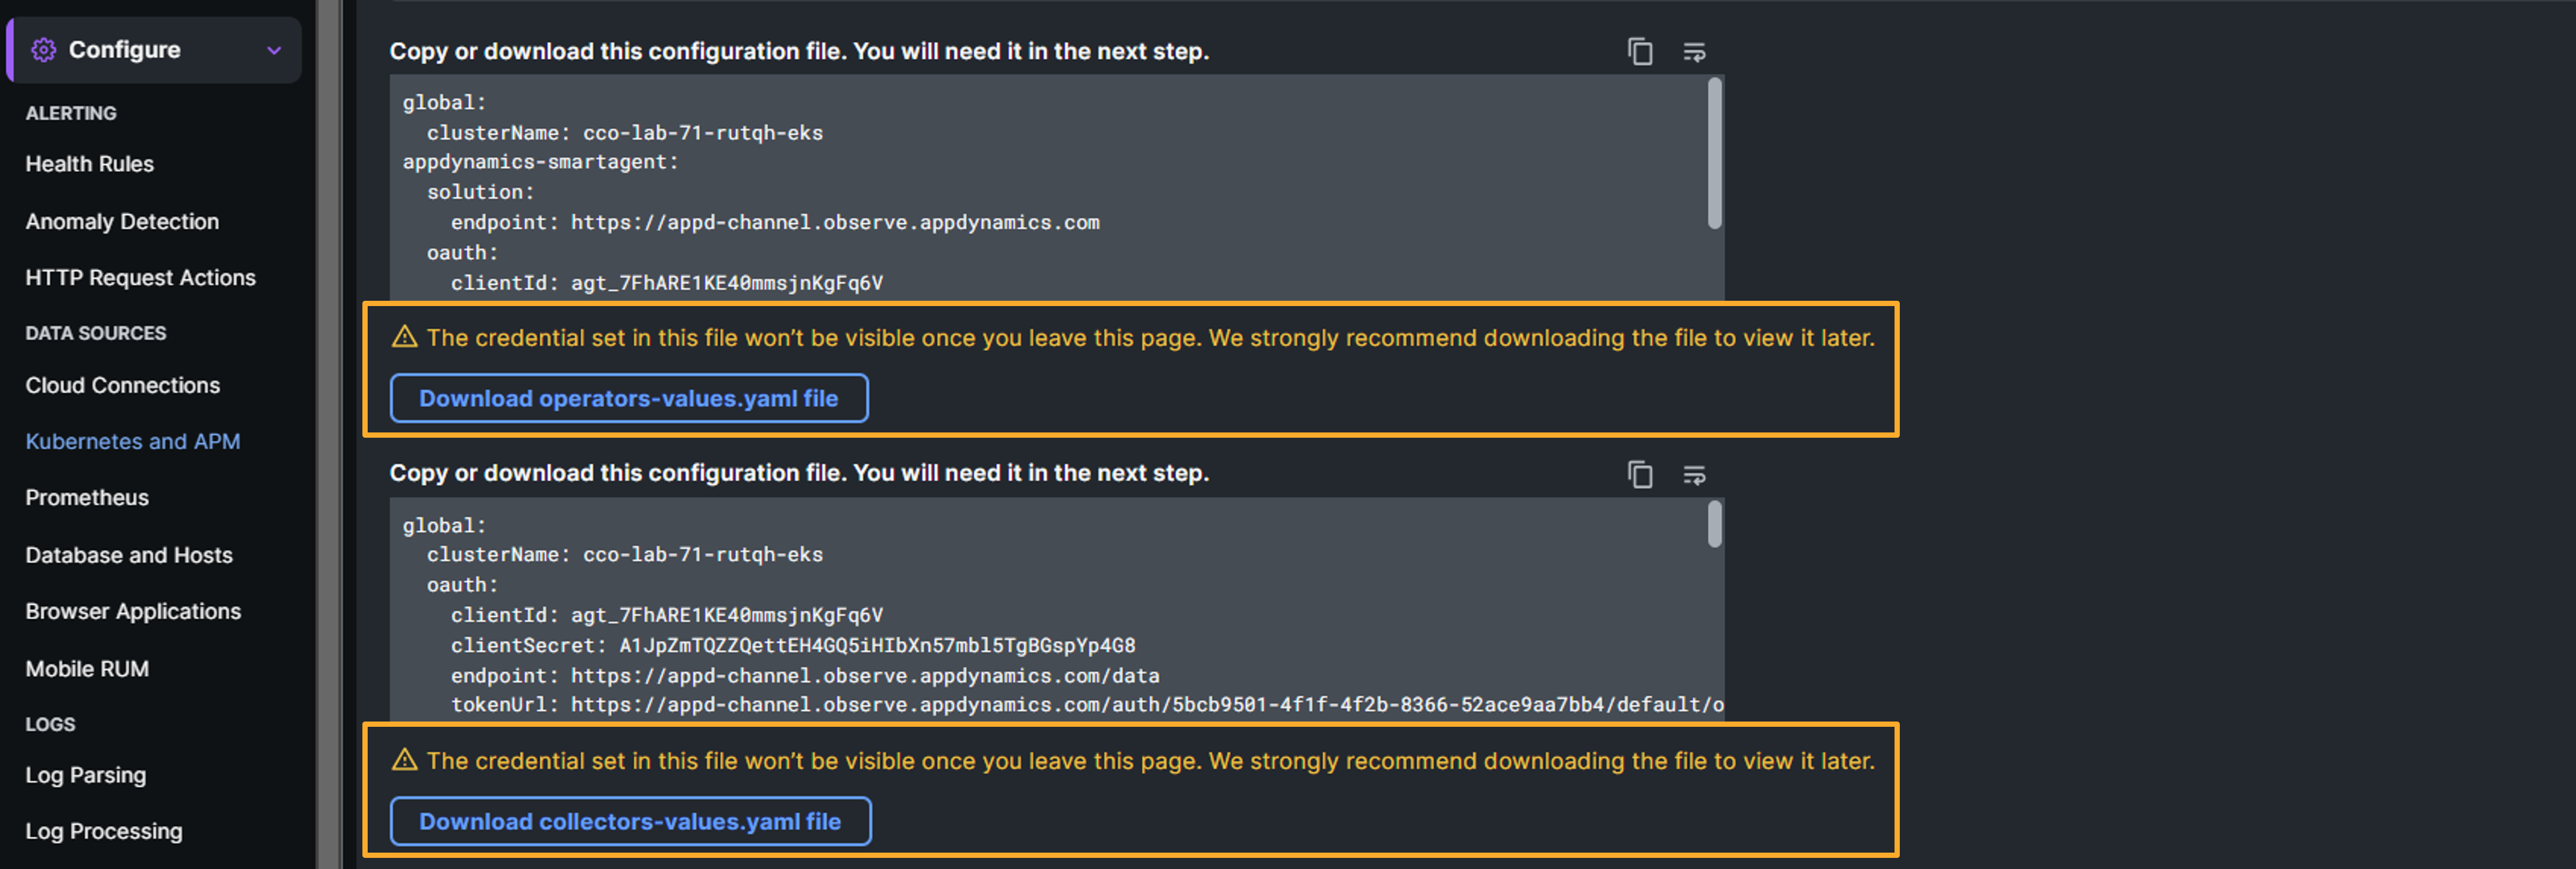
Two files will be produced based on the new credential set. The first, operators-values.yaml, is for the installation and configuration of CCO operators on the Kubernetes cluster. The second, collectors-values.yaml, is for setting up the OpenTelemetry collectors that you’ll deploy to the Kubernetes cluster in subsequent steps.
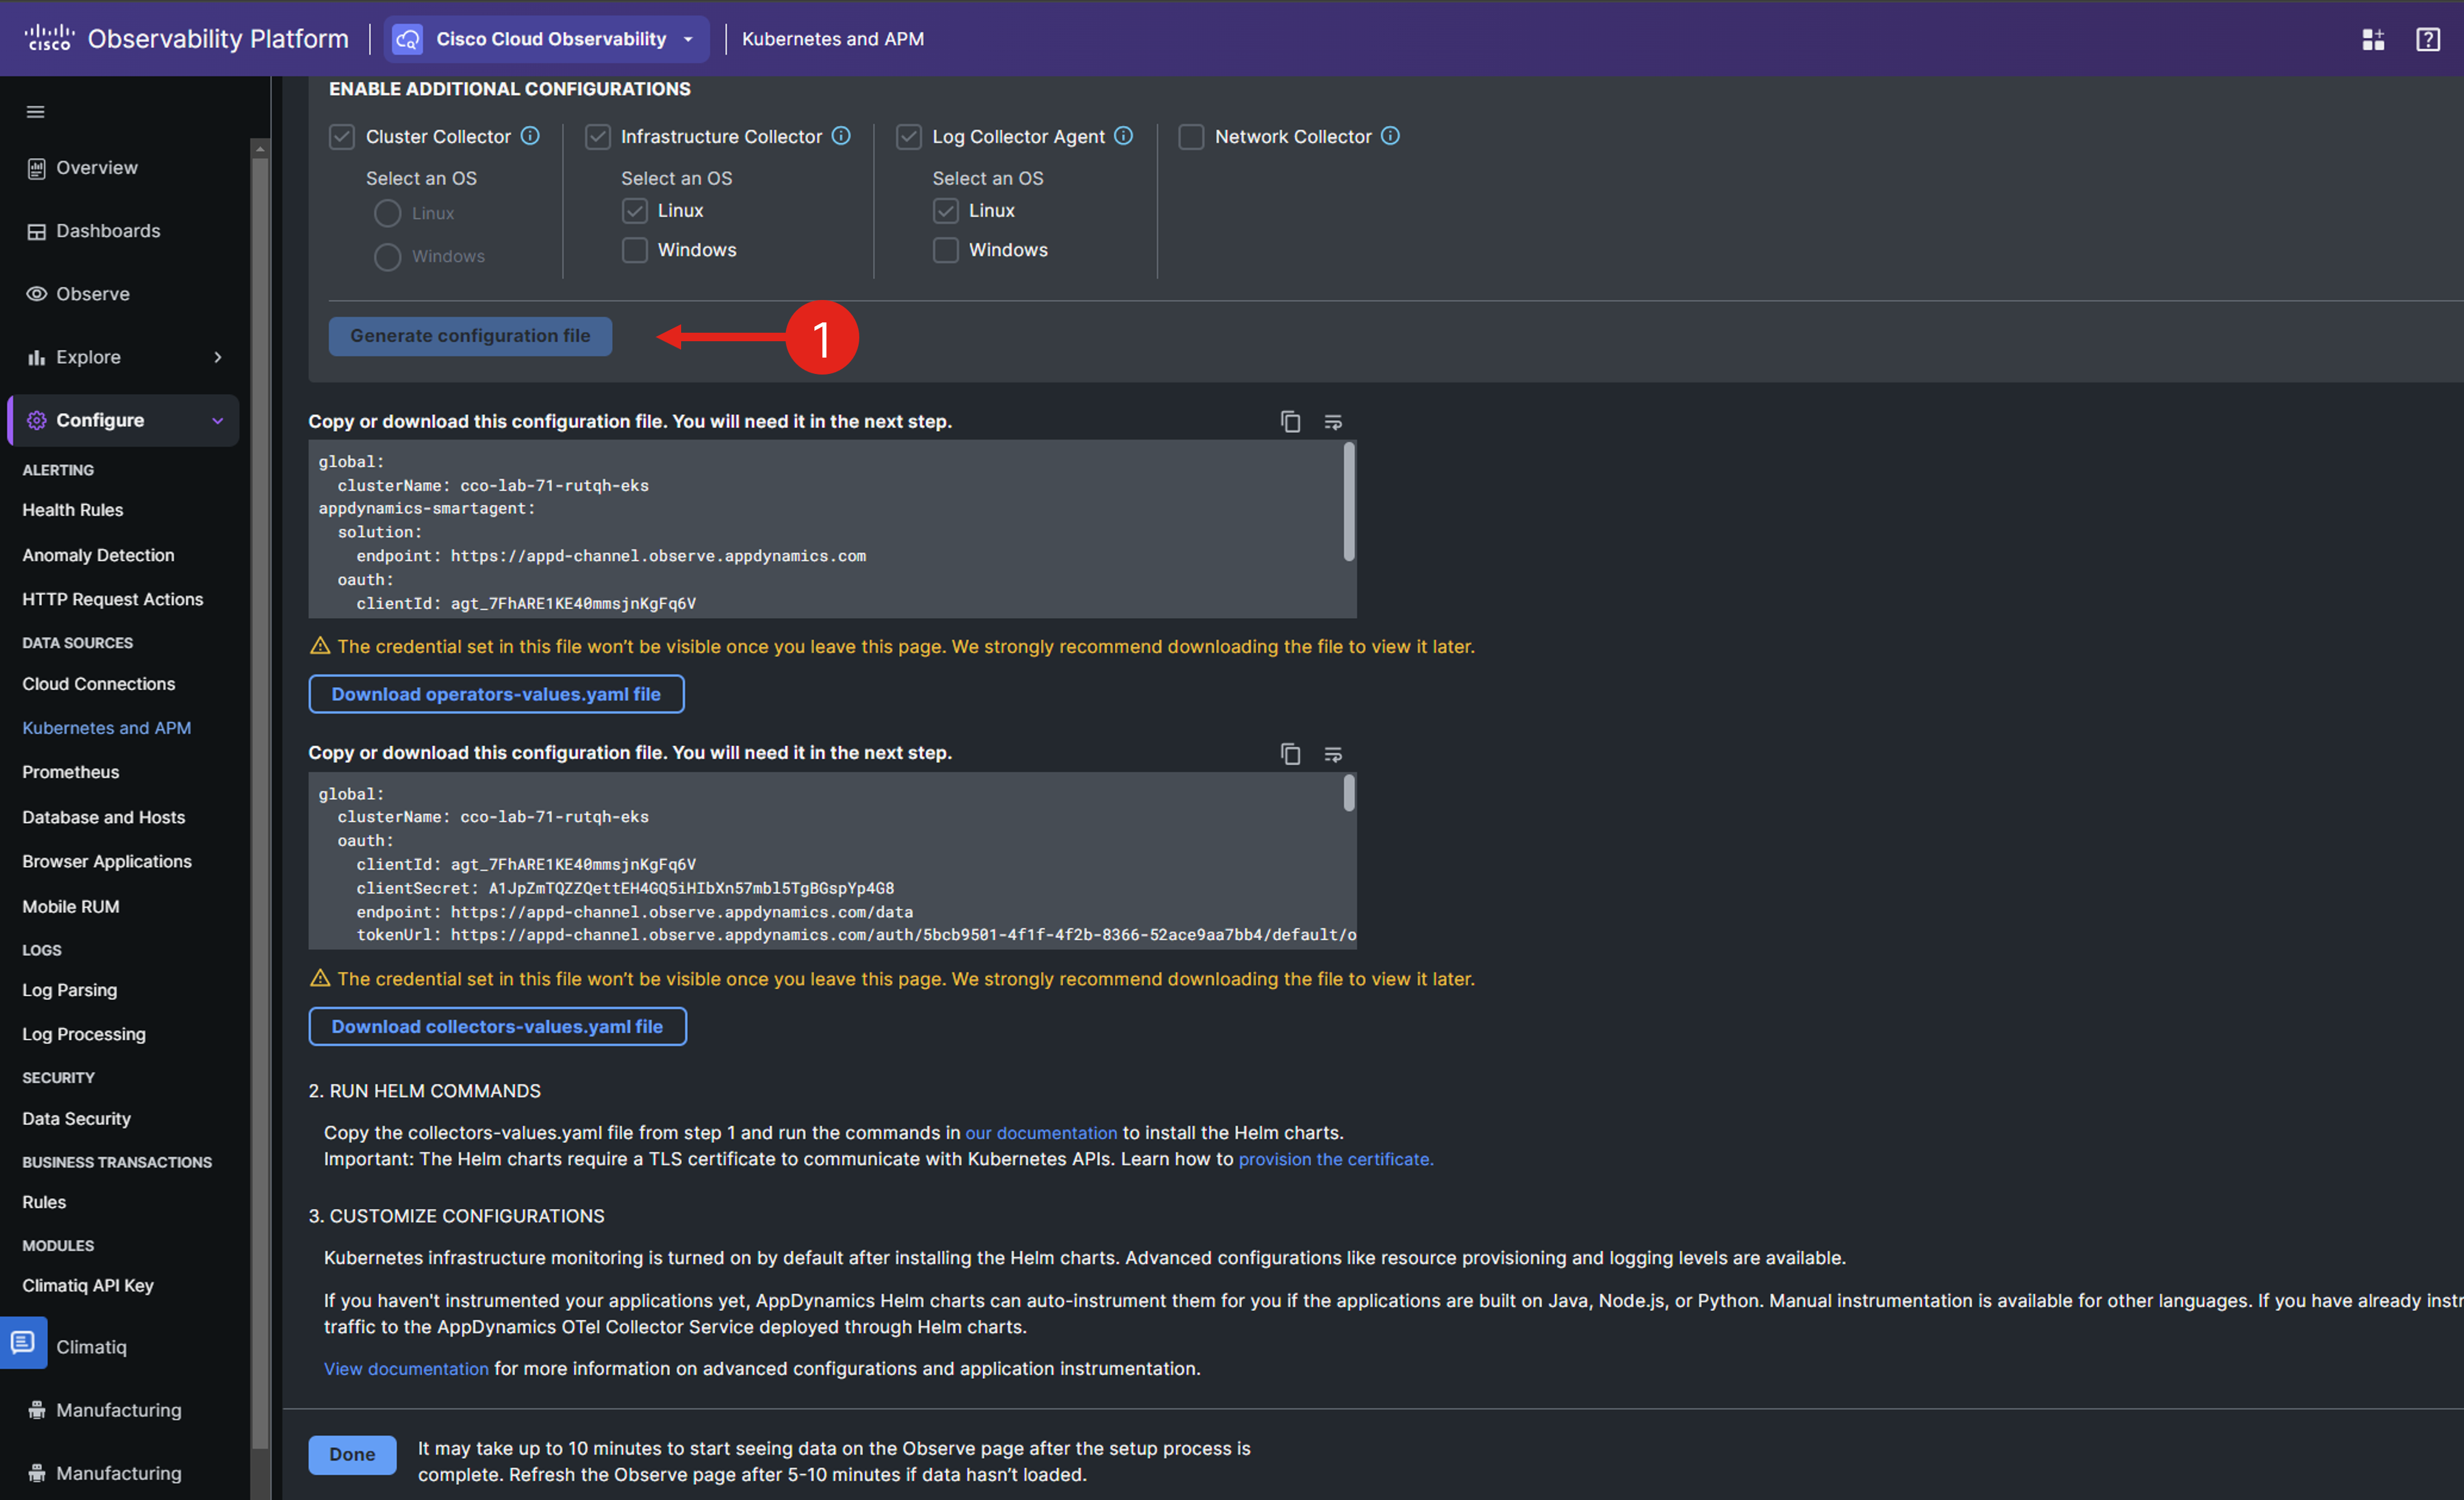
Save the two files operators-values.yaml and collector-values.yaml to your local machine, by clicking on the corresponding download buttons.
Upload the Configuration Files to your Cloud9 instance
Having successfully generated the essential configuration files for monitoring the application environment with CCO, your next step is to upload these files to your Cloud9 lab environment for use.
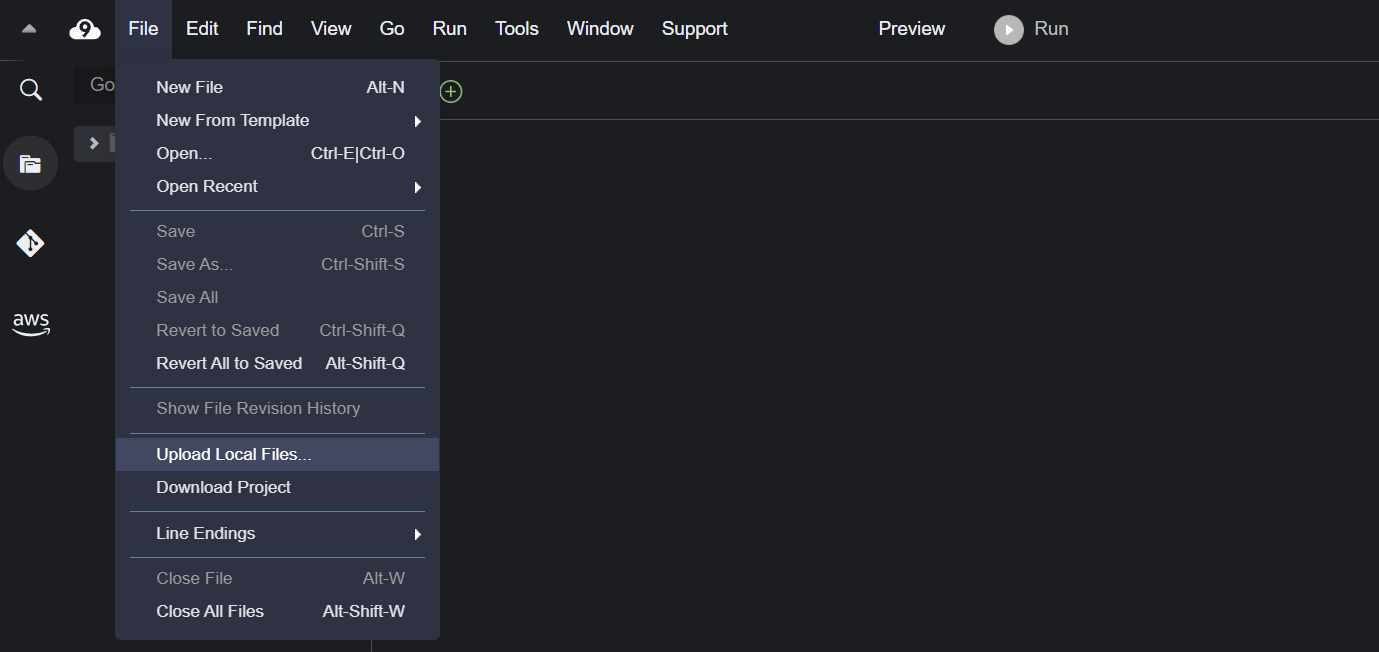
In the Cloud9 left sidebar, select the top-level directory labeled “CCO-Lab-user-info-Cloud9 - /home/ec2-user.” Then, navigate to the File menu and choose the Upload Local Files option.
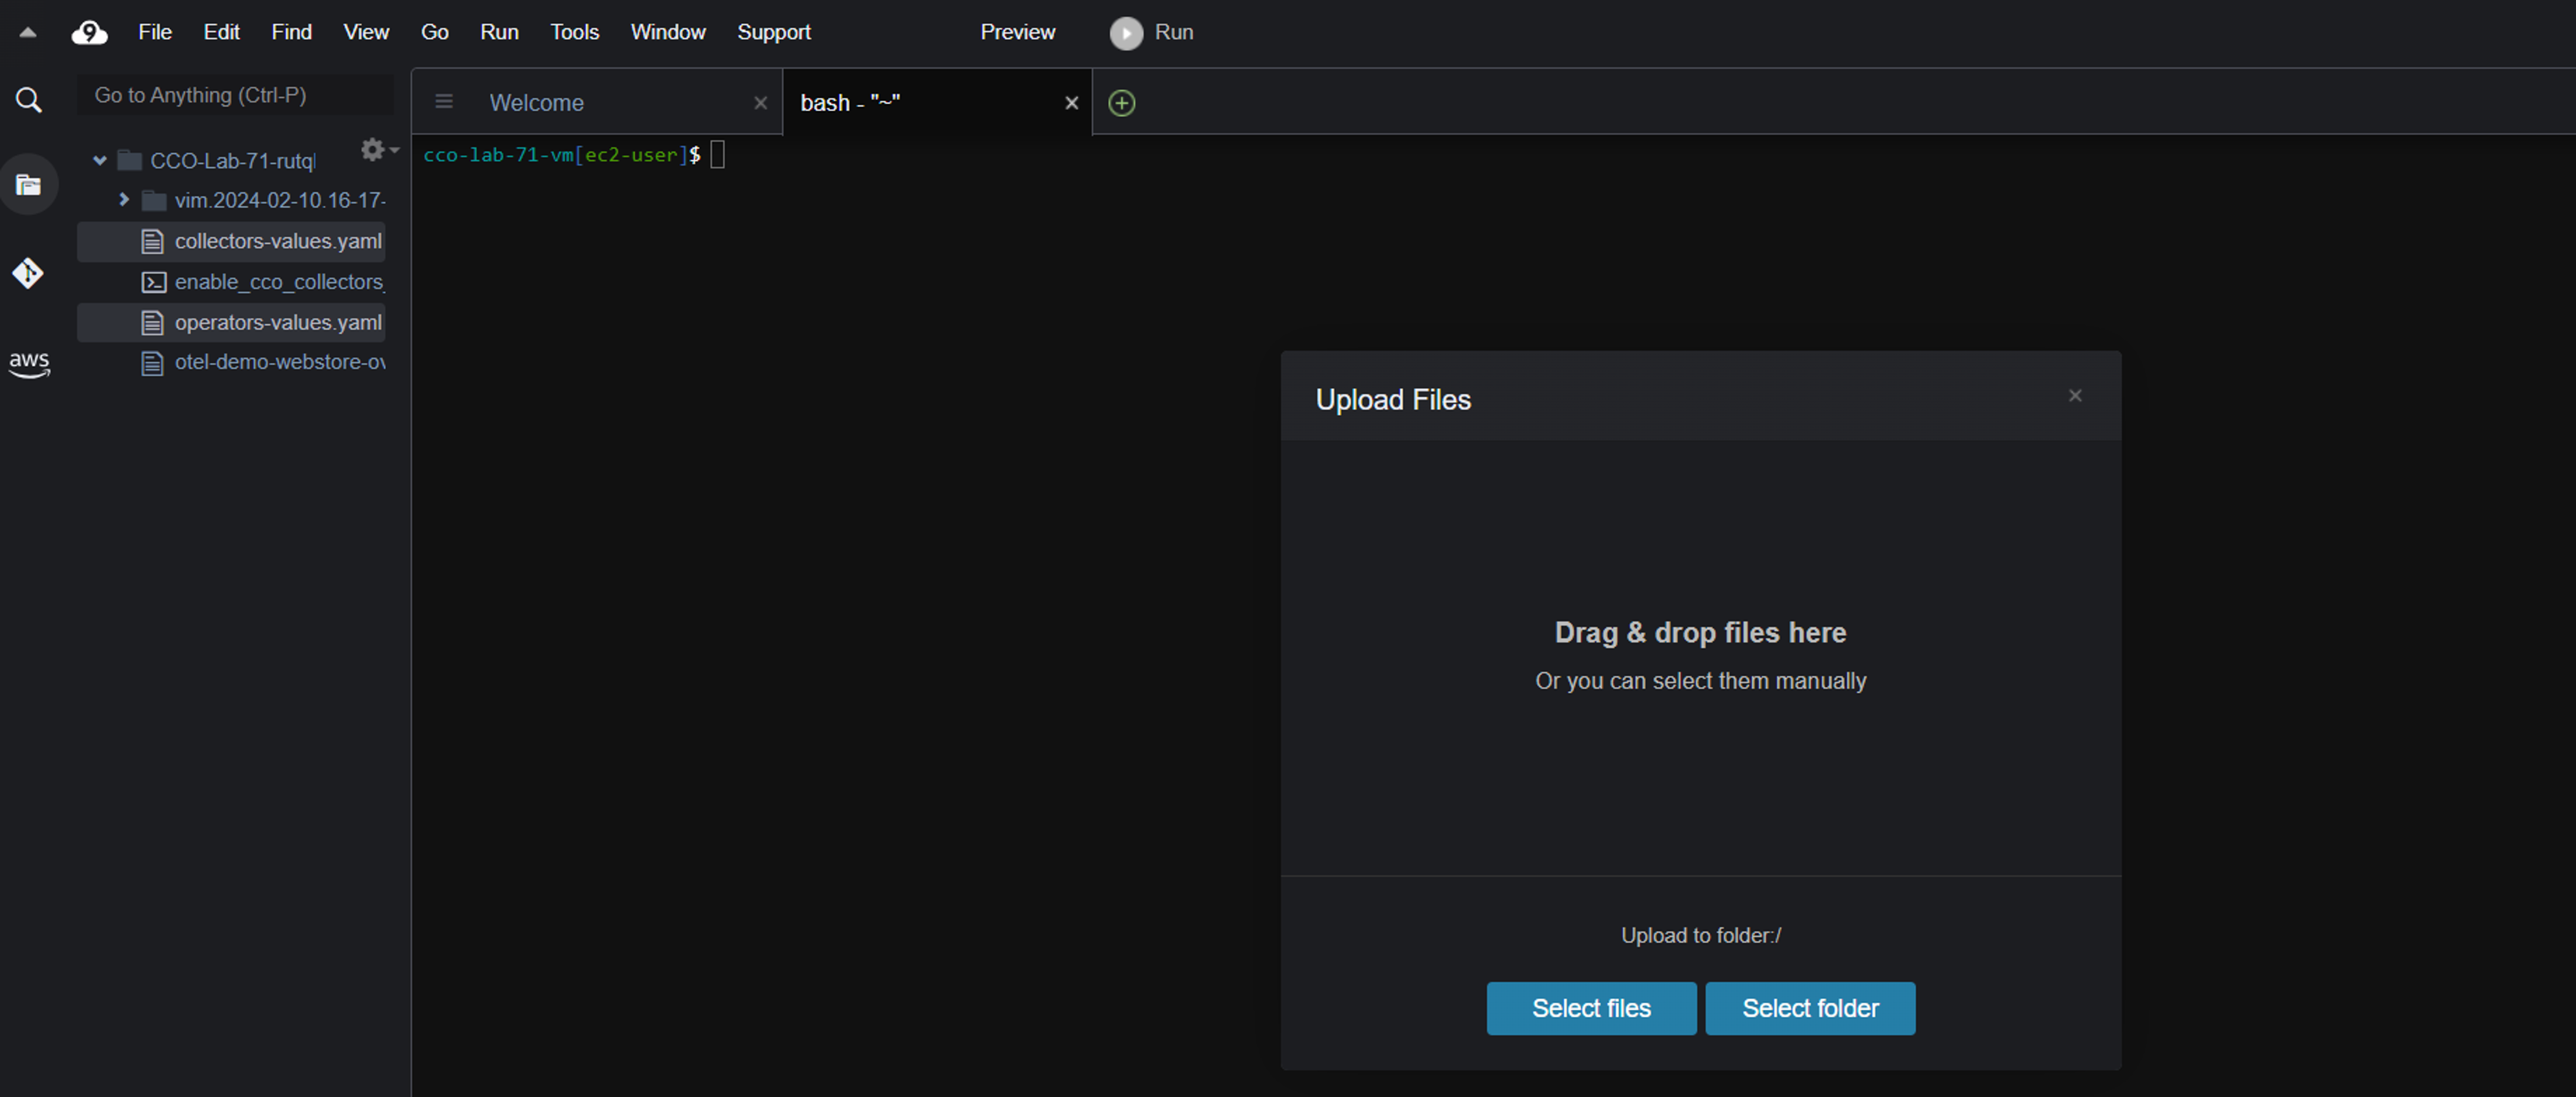
In the popup window that appears, upload the two files you previously downloaded: operators-values.yaml and collectors-values.yaml.
You’ve successfully created the configuration files needed for setting up Kubernetes and Application Performance Monitoring.
Coming Up Next
In the following section, you’ll utilize the generated files to implement the monitoring setup.